Author: Sunil Goyal

  • Vidal Health Claim Form PDF Download: Step-by-Step Guide to Fill, Submit & Track Your Claim

    Vidal Health Claim Form PDF Download: Step-by-Step Guide to Fill, Submit & Track Your Claim

    Written by the E-Insure First Content Team | Reviewed by Sunil Goyal, Director, E-Insure First | Last updated: July 2026

    Quick Answer:

    The Vidal Health claim form is a two-part reimbursement document — Part A filled by you, Part B filled by your treating hospital — used when you’re claiming money back after paying for hospitalisation yourself. You can download the latest PDF from Vidal Health TPA’s official downloads page. Cashless patients don’t need this form at all; the hospital handles a separate pre-authorisation form on their behalf. Reimbursement claims should reach Vidal Health within 20 days of discharge, along with your bills, discharge summary, and prescriptions.

    Filling out a claim form after a hospital stay is rarely anyone’s idea of a good afternoon, and it’s easy to lose ten minutes just figuring out which Vidal Health claim form you actually need. This guide walks through the whole thing — which form applies to your situation, exactly what each section is asking for, what to attach, and the small mistakes that quietly get claims rejected. If you’ve already submitted your documents, you can also learn how to check your Vidal Health claim status to monitor your reimbursement progress online.

    What is the Vidal Health Claim Form?

    Vidal Health Insurance TPA (IRDAI Reg. No. 016) is the third party who handles health insurance claim settlement of your original insurer. So, the Vidal health insurance claim form is a kind of document through which Vidal Health will get to know all the details when they process your claim where there is no cashless treatment and the insurer will send the amount there.

    It’s worth being clear on one thing upfront: Vidal Health isn’t your insurance company. It’s the administrator that verifies your claim and forwards it, but your insurer still makes the final approval call. That’s why the form asks for both your policy details and your TPA enrolment details — two different entities are involved in getting your claim paid. If you’re unfamiliar with this role, here’s a detailed guide explaining what a TPA in insurance is and how it works.

    Vidal Health Claim Form PDF Download

    Before filling out your reimbursement claim, it’s important to download the latest version of the Vidal Health claim form. Using an outdated form can delay processing or result in additional document requests.

    Here’s what to know about the Vidal Health TPA claim form PDF:

    • Where to download: Vidal Health TPA’s official downloads section on their website, listed under claim forms.
    • Official source only: Third-party PDF-editing sites often host older or slightly modified copies of this form. Always cross-check the version against the one on Vidal Health’s own site before submitting.
    • Latest version: The current form follows the standard IRDAI-prescribed format — “Claim Form for Health Insurance Policies Other Than Travel and Personal Accident” — split into Part A and Part B.
    • File format: Downloadable as a fillable PDF, which can be completed digitally or printed and filled by hand.

    Can’t find the current version on the official site? Message E-Insure First and we’ll send you the correct link.

    When Do You Need a Vidal Health Claim Form?

    Not every hospital visit needs this form filled out. Here’s when it actually applies:

    • Reimbursement claims: You paid the hospital bill yourself and are claiming the amount back — this is the main scenario the form is built for.
    • Planned hospitalisation without cashless approval: If your hospital isn’t in the network, or cashless wasn’t arranged in time, you’ll pay upfront and reimburse afterward.
    • Emergency hospitalisation: Emergencies sometimes bypass the pre-authorisation window entirely, especially if admission happens outside office hours — reimbursement becomes the fallback route.
    • Claims after discharge: Even for a cashless case, if there’s a gap the hospital didn’t cover (say, a non-payable item), you may need to submit a reimbursement form separately for that portion.

    One thing to flag clearly: cashless claims don’t use this form at all. For cashless treatment, the hospital’s insurance desk submits a separate pre-authorisation form directly to Vidal Health — you generally don’t fill anything beyond your ID and policy card at admission. If you need to understand that process in detail, read our guide on the Vidal pre-auth form and when hospitals use it.

    Types of Vidal Health Claim Forms

    Vidal Health uses different forms depending on the type of claim you’re making. Understanding which form applies to your situation helps avoid delays and ensures the correct documents are submitted from the beginning.

    Form Used For Who Fills It
    Pre-Authorisation Form Cashless treatment approval before or at admission Hospital
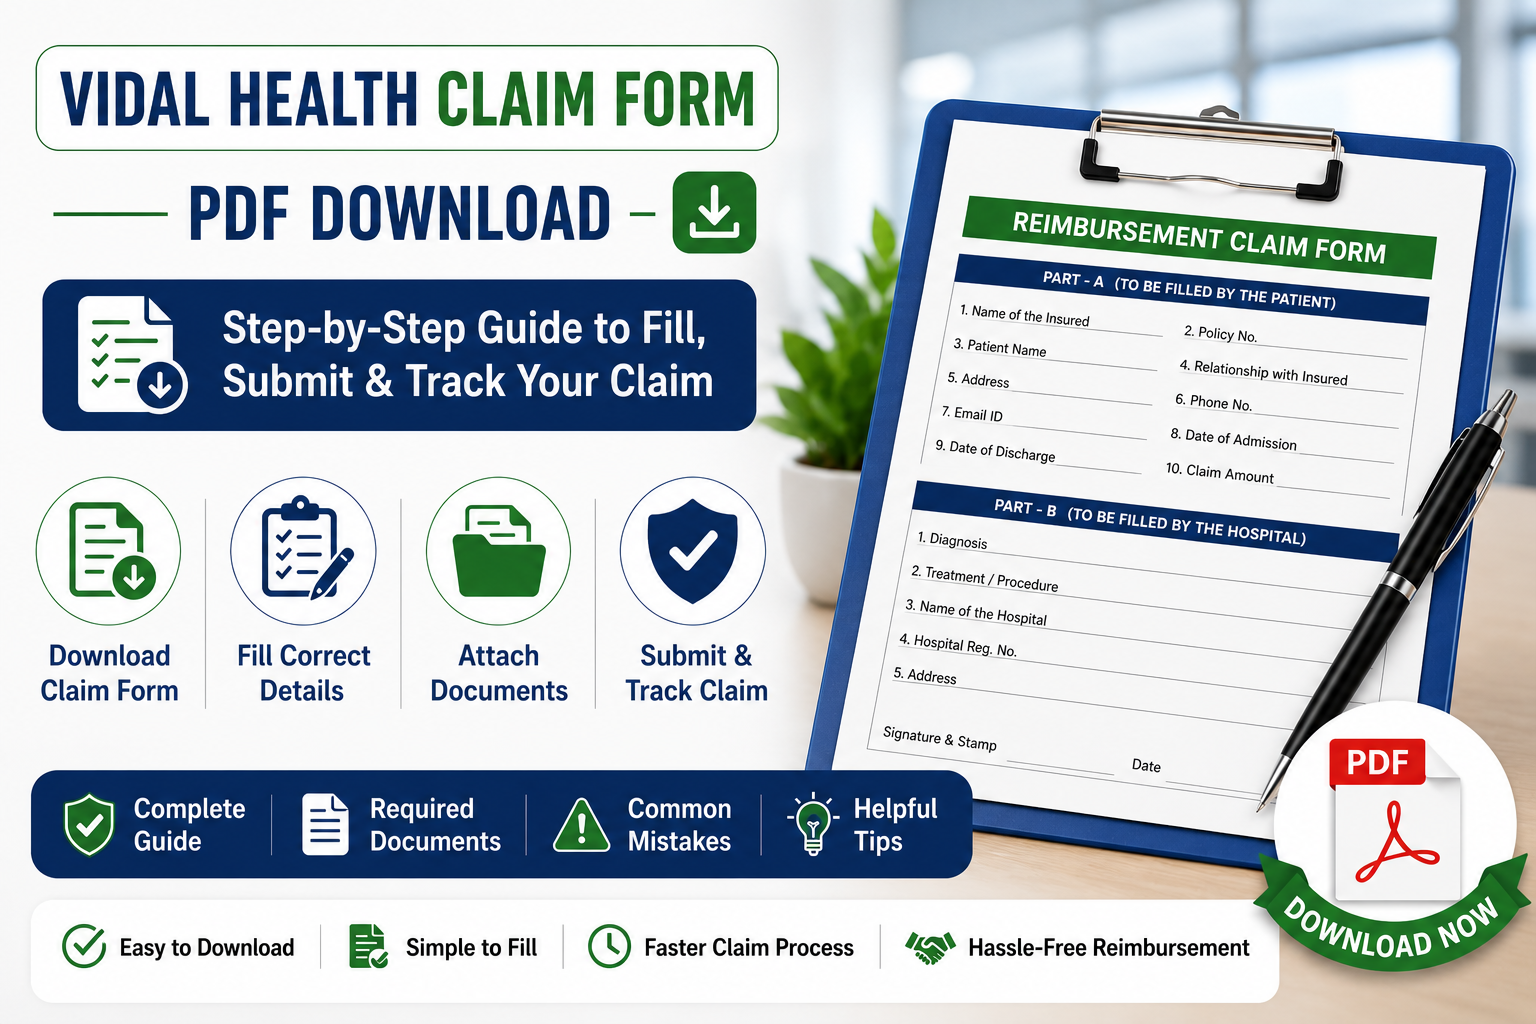
    Reimbursement Claim Form (Part A + Part B) Claiming money back after discharge Part A: Policyholder · Part B: Treating hospital/doctor
    Additional Document Request Form When Vidal Health needs extra clarification or paperwork Policyholder

    How to Fill the Vidal Health Claim Form: Step by Step

    Filling the claim form accurately is essential because even small mistakes can delay claim processing. The steps below explain exactly what information needs to be entered in each section of the reimbursement claim form.

    If you’re wondering how to fill claim form Part A Vidal Health requires, here’s the section-by-section breakdown:

    Step 1 – Patient details: Name, age, gender, relationship to the primary policyholder, and contact information, filled in block letters.

    Step 2 – Policy information: Policy number, TPA ID/enrolment number, insurer name, and sum insured details.

    Step 3 – Hospital details: Hospital name, address, and registration number — this part typically overlaps with what the hospital fills in Part B.

    Step 4 – Treatment details: Diagnosis, dates of admission and discharge, nature of treatment, and itemised expenses.

    Step 5 – Bank account details: Account number, IFSC code, and bank branch, exactly as they appear on your passbook or a cancelled cheque, since mismatches here are a common cause of payment delays.

    Step 6 – Declaration and signature: A signed statement confirming the information is accurate, dated and signed by the policyholder in the space provided.

    Part B – covering diagnosis codes, procedure details, and doctor’s registration number — is completed and signed separately by the treating hospital or doctor, not by you.

    Documents Required With the Claim Form

    Submitting a complete set of supporting documents is just as important as filling out the claim form correctly. Missing paperwork is one of the most common reasons reimbursement claims are delayed or returned for clarification.

    Document Mandatory
    Completed claim form (Part A & B) Yes
    Original hospital bills Yes
    Discharge summary Yes
    Doctor prescriptions Yes
    Diagnostic reports Usually
    Cancelled cheque Sometimes
    ID proof If requested

    How to Submit the Vidal Health Claim Form?

    Once you’ve completed the claim form and gathered all supporting documents, the next step is submitting them through the appropriate channel. Vidal Health offers multiple submission methods depending on your preference and document requirements.

    You have a few submission routes, and which one makes sense depends on your situation:

    • Through the hospital: Some hospitals with a Vidal Health tie-up will forward reimbursement paperwork on your behalf — worth asking at the insurance desk before you leave.
    • Online: Uploaded through the Vidal Health portal where available — the fastest option and best for tracking submission timestamps.
    • Email: Scanned copies sent to Vidal Health’s designated claims email address, useful when you need a written submission record.
    • Courier: Physical documents sent to Vidal Health’s processing office — use this if original documents are specifically required rather than scanned copies.
    • Physical submission: Dropping documents at a Vidal Health branch or designated collection point directly, if one is accessible to you.

    Online or email submission is generally the safer default, since it gives you a timestamped record. Courier or physical submission makes sense only when originals are explicitly requested.

    Cashless vs. Reimbursement Claim Form?

    Many policyholders confuse cashless and reimbursement claims, but the documentation process is different for each. The comparison below explains when each type of claim form is used and who is responsible for submitting it.

    This is the single most common point of confusion, so here it is side by side:

    Cashless Reimbursement
    Hospital submits the form You (the policyholder) submit the form
    Filed before treatment begins Filed after treatment and discharge
    Uses the Pre-Authorisation Form Uses the Claim Form (Part A + Part B)
    You pay nothing upfront (if approved) You pay first, then get reimbursed

    Common Mistakes While Filling the Vidal Health Claim Form

    • Missing signatures – Both the policyholder’s signature on Part A and the doctor’s/hospital’s signature on Part B are required — one missing signature stalls the whole form.
    • Wrong policy number – A single transposed digit sends the claim searching for a policy that doesn’t match, delaying verification.
    • Incomplete bills – Submitting a summary bill instead of the full itemised bill is a frequent reason claims bounce back for clarification.
    • Missing bank details – An incomplete or mismatched IFSC code means an approved claim still can’t be paid out.
    • Illegible handwriting – If it’s handwritten, print clearly in block letters — unreadable entries get treated as missing information.
    • Missing discharge summary – This single document ties together diagnosis, treatment, and dates — without it, the claim can’t be assessed properly.

    Why Your Claim Form May Be Rejected?

    Even when treatment is covered, claims can still be delayed or rejected because of documentation errors or policy conditions. Understanding these common reasons can help you avoid unnecessary delays.

    A rejection isn’t always about the form itself. Common reasons include:

    • Incomplete form: A section left blank, especially in Part A or the declaration.
    • Missing documents: Even one absent bill or report can hold up the entire claim.
    • Waiting period not completed: Certain conditions have a policy-specific waiting period before they’re covered.
    • Policy exclusions: Some treatments or conditions simply aren’t covered under your specific plan.
    • Wrong or inconsistent information: Details on the form not matching hospital records or your policy details.
    • Delayed submission: Reimbursement claims are generally expected within 20 days of discharge — check your specific policy wording, since this window can vary.

    What to Do if Your Claim Form Is Rejected?

    1. Read the rejection letter carefully to understand the exact reason cited.
    2. Contact Vidal Health directly to clarify what’s missing or disputed.
    3. Contact your insurer as well, since they hold the final decision-making authority.
    4. Resubmit any missing documents promptly if that’s the stated reason.
    5. Request a formal review if you believe the rejection is incorrect.
    6. Escalate to your insurer’s grievance redressal officer if the review doesn’t resolve it.
    7. File a complaint with IRDAI’s Bima Bharosa portal as a last resort, if you believe the rejection is unjustified.

    If your grievance remains unresolved, you can submit a complaint through the IRDAI Bima Bharosa portal, which handles insurance-related consumer grievances.

    How to Check Claim Status After Submitting the Form?

    Once your form and documents are in, you can track progress using your enrolment ID, claim number, or registered mobile number on the Vidal Health portal, or by calling customer care directly. We’ve covered the full process — including what each status stage means — in our detailed Vidal Health Claim Status guide. If your claim is being processed through another TPA, you can also learn how to check your FHPL claim status, as the tracking process is similar across many TPAs.

    Submitted your form and want to know what happens next? Read our claim status tracking guide.

    Vidal Health Customer Care

    Channel Details
    Phone 080-2800 4114 (national helpline)
    WhatsApp Missed call to 022-4892 6099 to start a chat
    Office Hours 24/7 helpline, with a dedicated corporate help desk during business hours
    Official Website https://www.vidalhealthtpa.com/vidalhealthtpa

    Expert Tips Before You Submit the Form

    • Keep photocopies of every original document before you send anything, especially if submitting by courier.
    • Scan documents in good lighting and legible resolution if submitting online or by email — blurry scans are a common cause of “resubmit” requests.
    • Use your registered email address for any digital submission, since Vidal Health matches correspondence against the email on file.
    • Double-check bank account and IFSC details against a cancelled cheque, not from memory.
    • Save the acknowledgement or reference number you receive after submission — you’ll need it for status tracking.

    Expert Note:

    This guide has been prepared after reviewing the official Vidal Health TPA claim process, IRDAI claim guidelines, and publicly available reimbursement claim documentation. The information has been verified at the time of publication; however, claim procedures, document requirements, and submission timelines may change, so policyholders should always verify the latest instructions on the official Vidal Health website.

    Final Verdict

    Getting your Vidal Health claim form right on the first try comes down to a few basics: download the current version from the official site, fill Part A completely and legibly, make sure Part B is properly completed by the hospital, attach every required document, and submit within the claim window. Once it’s in, track it through the portal using your enrolment ID or claim number rather than waiting for an update to come to you.

    Want a second pair of eyes on your claim form before you submit it? Talk to E-Insure First — no charge for the first review.

    Frequently Asked Questions

    Where can I download the Vidal Health claim form?

    The official PDF is available on Vidal Health TPA’s website under their claim forms/downloads section. Always use the version from their official site rather than third-party PDF editing tools.

    Is the claim form different for cashless treatment?

    Yes. Cashless treatment uses a separate Pre-Authorisation Form submitted by the hospital. The reimbursement claim form (Part A and Part B) is only needed when you’re claiming money back after paying yourself.

    Can I submit the Vidal Health claim form online?

    Yes, where the online submission option is available, it’s generally the fastest and easiest route to track, since it gives you a digital timestamp of submission.

    What documents are required with the claim form?

    At minimum: the completed claim form, original hospital bills, discharge summary, and doctor prescriptions. Diagnostic reports, a cancelled cheque, and ID proof may also be requested depending on the claim.

    How long does Vidal Health reimbursement take?

    Processing time varies by claim complexity and document completeness. Submitting a complete, accurate form the first time is the single biggest factor in avoiding delays.

    Can I edit the claim form after submission?

    Not directly. If you notice an error after submitting, contact Vidal Health customer care to correct it rather than resubmitting a new form, which can create duplicate records.

    Who signs the Vidal Health claim form?

    Part A is signed by the policyholder (or the insured person making the claim). Part B is completed and signed separately by the treating doctor or hospital.

    Can someone else submit the form on my behalf?

    Yes, a family member or representative can generally submit the completed form and documents, as long as the declaration in Part A is signed by the actual policyholder or insured person.

    Is there a separate Vidal Health cashless claim form?

    Not one you fill yourself — cashless treatment uses the hospital-submitted Pre-Authorisation Form instead of the policyholder-filled reimbursement claim form.

    About E-Insure First: E-Insure First is an independent insurance advisory platform led by Director Sunil Goyal, helping Indian policyholders compare, buy and manage general and health insurance policies. This article reflects publicly available information from Vidal Health Insurance TPA (IRDAI Registration No. 016) as of July 2026, and is updated periodically. It does not replace guidance from Vidal Health or your insurer — always verify form versions, timelines, and submission requirements directly with them, since these can change.

  • Vidal Health Claim Status: How to Check It Online (2026 Guide)

    Vidal Health Claim Status: How to Check It Online (2026 Guide)

    Written by the E-Insure First Content Team | Reviewed by Sunil Goyal, Director, E-Insure First | Last updated: July 2026

    Quick Answer:

    To check your Vidal Health claim status, go to the Vidal Health TPA employee portal at vidalhealthtpa.com/employeeportal/ and enter your enrolment ID, pre-authorisation number, claim number, registered mobile number, or email ID. The portal shows real-time progress instantly, no separate account creation needed. You can also call Vidal Health’s customer support helpline at 080-2800 4114 or send a WhatsApp missed call to 022-4892 6099 if you’d rather not use the portal.

    If you’ve been hospitalised or filed a reimbursement claim through a group health policy, there’s a good chance a company called Vidal Health, not your actual insurer, is the one processing it behind the scenes. That confuses a lot of people the first time they try to check Vidal Health claim status and can’t find it on their insurer’s app. This guide reflects the latest Vidal Health claim tracking process, employee portal, customer care numbers, reimbursement forms, and claim status methods available as of July 2026. If you are new to health claim processing, understanding what is TPA in insurance can help you know how third-party administrators manage claims between insurers, hospitals, and policyholders.

    Confused about why your TPA and insurer are showing different information? Ask E-Insure First — we’ll help you make sense of it.

    What is Vidal Health TPA?

    Vidal Health Insurance TPA is an IRDAI-licensed Third-Party Administrator, established in 2002 and headquartered in Bangalore. After merging with Vipul MedCorp, it became one of India’s largest TPA networks, with 12,000+ empanelled hospitals across 800+ cities and roughly 40 offices spread over 28 states. Vidal Health doesn’t sell insurance itself — it processes claims on behalf of over 20 insurers, including names like HDFC ERGO, ICICI Lombard, and Niva Bupa, mostly for corporate and group health policies.

    This distinction matters more than it sounds. Your insurer decides what’s covered under your policy and makes the final approval call; Vidal Health is the administrator running the paperwork, hospital coordination, and claim tracking in between. That’s exactly why a Vidal Health insurance claim status lookup sometimes shows different or more detailed information than what your insurer’s own app displays.

    How to Check Vidal Health Claim Status Online?

    Here’s how to check Vidal Health claim status online in under a minute:

    Here’s how to check Vidal Health claim status online in under a minute. Policyholders can also access claim tracking, hospital details, and member services directly through the official Vidal Health TPA website.

    1. Go to the official Vidal Health TPA employee portal.
    2. Enter any one of the following: your enrolment ID, pre-authorisation number, claim number, registered mobile number, or email ID.
    3. Submit the details — the portal pulls up real-time progress without requiring a separate login or password for a first-time check.
    4. Your claim stage will display: registered, under review, documents pending, approved, or settled.

    This same process works whether you’re trying to check Vidal Health TPA claim status online for a cashless hospitalisation or a reimbursement claim you’ve filed after discharge.

    Still can’t locate your claim after trying the portal? Reach out to E-Insure First — we’ll help you figure out the right reference number to use.

    Vidal Health Login: Portal, App and Provider Access

    Beyond a one-time status check, Vidal Health runs a few different login points depending on who you are:

    Login Type 

    Who It’s For 

    What You Need 

    Vidal Health login (Employee Portal) 

    Policyholders under a group/corporate health policy 

    Enrolment ID, claim number, or registered mobile/email 

    Vidal provider login 

    Network hospitals coordinating cashless claims 

    Hospital-issued provider credentials 

    Vidal health app 

    Individual members wanting mobile access 

    Registered mobile number, downloadable from Play Store/App Store 

    Agent/Corporate portal 

    HR teams and intermediaries managing group policies 

    Corporate login credentials issued separately 

    If you’re specifically searching vidal health portal login or vidal tpa login and landing on a blank or “upgrading” screen, this usually means you’re on the older individual login page — the employee portal linked above is the actively maintained one for most group policy members.

    What Each Claim Status Stage Means

    Vidal Health claim status updates show the current progress of your health insurance claim. Each status represents a different stage, from claim registration and document verification to final approval or settlement.

    Status Shown 

    What It Means 

    Claim Registered 

    Your claim or pre-authorisation request has been logged in Vidal’s system. 

    Under Review 

    Vidal Health is verifying your documents and the hospital bill against your policy terms. 

    Query Raised / Documents Pending 

    Additional information is needed from you or the hospital before processing can continue. 

    Sent to Insurer 

    Vidal has completed its verification and forwarded the claim to your insurer for final approval. 

    Approved 

    The claim has been sanctioned; payment or cashless authorisation is being processed. 

    Settled / Closed 

    Payment has reached the hospital (cashless) or your bank account (reimbursement), and the file is closed. 

    Typical Vidal Health Claim Timeline

    The time required to process a Vidal Health claim depends on the claim type, hospital response, and document verification. Below is the general timeline for cashless and reimbursement claim processing.

    Stage 

    Typical Time 

    Cashless pre-authorisation 

    30 min–6 hrs 

    Document verification 

    1–3 days 

    Insurer approval 

    1–5 days 

    Reimbursement processing 

    7–30 days 

    Cashless vs. Reimbursement: Tracking Looks Different

    A cashless claim starts the moment the hospital’s insurance desk submits your pre-authorisation form to Vidal Health — you can typically track claim status within a few hours of admission. A claim reimbursement does not start moving unless you hand over the duly filled up claim form (Form No. 9) with the bills, discharge summary and the prescriptions in about 7 days after being discharged from the hospital. In case you’re looking up for the status and can’t see anything, it’s highly likely that the claims documents have not been logged yet.

    Vidal Health Network Hospital List

    Before you’re admitted anywhere, it’s worth confirming the hospital is actually in Vidal Health’s network, since that’s what determines whether you get cashless treatment or have to pay and claim reimbursement later. The Vidal Health hospital list is available directly on their website and covers all 12,000+ empanelled hospitals, searchable by city — useful if you’re checking availability in Bangalore, Chennai, or any of the other 800+ cities they operate in. Users can verify official TPA registration details through the IRDAI registered TPA list.

    Want help confirming if your nearest hospital is cashless-network eligible? Ask E-Insure First before you’re admitted, not after.

    Vidal Health Preauth Form and Claim Form

    Two documents come up constantly in this process:

    Vidal Health preauth form: Filled out at the hospital’s insurance desk for cashless treatment. The hospital typically handles submission directly to Vidal Health on your behalf — you just need your policy/ID card. Similar to Vidal Health, policyholders can also check the Medi Assist pre-auth form process to understand how different TPAs handle cashless approvals.

    Vidal Health claim form (Form No. 9): Used for reimbursement claims, available for download on Vidal Health’s official website. It needs to be filled completely and submitted with your hospital bills, prescriptions, discharge summary, and diagnostic reports.

    Incomplete forms are the single biggest reason reimbursement claims stall in the “documents pending” stage — double-check every field before submitting.

    Vidal Health Customer Care, Toll-Free Number and WhatsApp

    If you are unable to track your claim online or need help with documents, Vidal Health provides multiple support channels. You can contact customer care through phone, WhatsApp, or official support options.

    Channel 

    Details 

    Vidal Health customer care number 

    080-2800 4114 (national helpline) 

    Vidal Health WhatsApp number 

    Missed call on 022-4892 6099 to start a WhatsApp chat 

    Availability 

    24/7 helpline with a dedicated corporate help desk 

    Official website 

    vidalhealthtpa.com  

    Numbers listed as “toll-free” for TPAs can vary by region and policy type. If the number above doesn’t connect, check the number printed on your specific policy/ID card, since large TPAs sometimes run separate lines for different insurer partnerships.

    New India Assurance and Other Insurer Policies Handled by Vidal Health

    This is very common and it should not cause concern if your New India Assurance policy paperwork or ID card indicates Vidal Health as the TPA. New India Assurance, for instance, utilizes Vidal Health as their appointed third-party administrator(TPA) who would handle the claims filed on their policy. You can utilize the Vidal Health portal to follow up on claim proceedings however, the approval decision lies ultimately with your insurer.

    Why Your Vidal Health Claim May Be Delayed?

    Vidal Health claim delays usually happen because of missing information, pending verification, or additional approval requirements. Understanding the common reasons can help you resolve issues faster.

    • Missing documents
    • Hospital hasn’t uploaded bills
    • Policy exclusions
    • Waiting for insurer approval
    • Medical clarification required
    • Incorrect bank details
    • Duplicate documents
    • Pending KYC

    Vidal Health Claim Rejected? Here’s What to Do Next

    If your Vidal Health claim is rejected, don’t panic. Many claim rejections can be resolved by correcting documents or providing additional information.

    • Check the rejection reason on the Vidal Health portal, email, or SMS.
    • Contact Vidal Health or your insurer to understand why the claim was declined. Remember, Vidal Health processes claims, but the insurer makes the final decision.
    • Review your policy to check for exclusions, waiting periods, or coverage limits. Before filing a claim, knowing common insurance policy exclusions can help you understand why some treatments or expenses may not be covered.
    • Submit any missing documents, such as hospital bills, discharge summary, prescriptions, or claim forms, if requested.
    • Request a claim review if you believe the rejection was incorrect.
    • Escalate the complaint through your insurer’s grievance cell or the IRDAI if the issue remains unresolved.

    Common reasons for rejection: incomplete documents, policy exclusions, waiting periods, delayed claim submission, or treatments not covered under your health insurance policy.

    Common Mistakes to Avoid

    Small errors during claim submission can increase processing time or lead to unnecessary delays. Avoid these common mistakes while tracking or submitting your Vidal Health insurance claim.

    • Checking status on your insurer’s app instead of Vidal’s portal. If Vidal Health is your TPA, the most current claim progress usually shows on their portal first, since they process the claim before forwarding it to the insurer.
    • Using an outdated mobile number. Vidal’s system matches against your registered number — an old number returns no results, not an error message explaining why.
    • Submitting incomplete reimbursement documents. Missing even one bill or prescription page is enough to push a claim into “documents pending” indefinitely.
    • Assuming a hospital is cashless without checking. Always confirm against the current hospital list before treatment, not after you’ve been billed.
    • Delaying reimbursement submission. Filing well past the 7-day guidance window can complicate processing, even if the claim is otherwise valid.

    Expert Tips

    Following a few simple practices can make your Vidal Health claim process smoother and reduce the chances of document-related delays.

    • Photocopy every original document before submitting a reimbursement claim — originals can get delayed or misplaced in processing, and you’ll want your own record.
    • Save your enrolment ID somewhere accessible outside your policy documents (a phone note works fine) — it’s the fastest single credential for any future status check.
    • If a claim has been stuck in “under review” for over two weeks with no update, call the helpline directly rather than continuing to refresh the portal.
    • For cashless treatment, get the hospital’s insurance desk to confirm pre-authorisation submission before you leave the admission counter — this avoids surprises at discharge.

    Final Verdict

    Once you realise you are addressing a TPA rather than the insurer the best method of keeping track of your Vidal Health claim status remains using the employee portal. This will provide you with the most accurate and real time status than any of the insurer’s apps. Have your enrollment ID ready with you, confirm your hospital’s network with them prior to hospitalisation, and if the claim lies static for more than two weeks it is a direct telephone call to the helpline that helps you rather than remaining stuck at the portal. You can also learn how to check your FHPL claim status if your policy uses another health insurance TPA.

    Dealing with a stuck claim or unclear TPA process? Talk to E-Insure First — no charge for the first consultation.

    Frequently Asked Questions

    Here are answers to common questions about Vidal Health claim status, online tracking, customer care support, reimbursement claims, and TPA services.

    How do I check my Vidal Health insurance claim status online?

    Visit the Vidal Health TPA employee portal and enter your enrolment ID, pre-authorisation number, claim number, mobile number, or email ID. The status displays instantly without needing a separate login.

    Is Vidal Health my insurance company?

    No Vidal Health is a TPA and processes and handles your claims in between your provider of insurance and you. Your provider determines and approves and covers the treatment. Vidal Health simply handles the coordination.

    What is the Vidal Health customer care number?

    The national helpline is 080-2800 4114, available 24/7. You can also reach support via a WhatsApp missed call to 022-4892 6099.

    Why does my Vidal Health claim status show no results?

    This usually means the reference number entered doesn’t match their records exactly, the registered mobile number has changed, or, for reimbursement claims, the documents simply haven’t been logged into the system yet.

    How do I find Vidal Health’s network hospital list?

    The full hospital list is available on Vidal Health’s official website, searchable by city. Always verify a hospital’s cashless status before admission rather than assuming based on a previous visit.

    What documents do I need for a Vidal Health reimbursement claim?

    You’ll need the completed claim form (Form No. 9), original hospital bills, discharge summary, prescriptions, and diagnostic reports, ideally submitted within 7 days of discharge.

    About E-Insure First: E-Insure First is an independent insurance advisory platform led by Director Sunil Goyal, helping Indian policyholders compare, buy and manage general and health insurance policies. This article reflects publicly available information from Vidal Health TPA’s official website and industry sources as of July 2026, and is updated periodically. It does not replace guidance from Vidal Health or your insurer — always verify claim-specific details directly with them, since contact numbers and portal processes can change.

  • How to Find Your Insurance Policy Number Online (2026 Guide)

    How to Find Your Insurance Policy Number Online (2026 Guide)

    Written by the E-Insure First Content Team | Reviewed by Sunil Goyal, Director, E-Insure First | Last updated: July 2026

    Quick Answer:

    The fastest way to find your insurance policy number online is to log in to your insurer’s app or customer portal using your registered mobile number or email, where it’s usually shown on the “My Policies” or “Dashboard” page. If you don’t have login access yet, check your policy confirmation email, renewal SMS, or premium payment receipt — all of these carry the policy number. As a last resort for motor insurance, you can pull it up using just your vehicle registration number through the government’s Vahan portal.

    You need your policy number to file a claim, renew a policy, or even just answer a call from customer care — and it’s surprisingly common to not have it handy when you actually need it. If you’re trying to figure out how to find insurance policy number online, the good news is that in almost every case, you don’t need to dig through a filing cabinet. This guide covers the fastest ways to pull it up for car, bike, health, and life insurance, including what to do when you’ve genuinely lost every document. If you don’t have your insurance details available, you can also learn how to find insurance policy number by vehicle number using online methods.

    Can’t locate your policy number anywhere? Send E-Insure First your name and insurer — we’ll help you track it down without the runaround.

    Where Your Policy Number Actually Lives

    Before jumping into insurer-specific steps, it helps to know that your policy number is never stored in just one place.

    Method Best For Requirement
    Insurer App/Website All policies Mobile number/email
    Policy PDF Existing customers Downloaded document
    Email Search Lost documents Registered email
    Vahan Portal Car & Bike Insurance Vehicle number
    Customer Care No login access Identity verification

    It shows up on:

    • The policy confirmation email sent when you bought the cover
    • Your digital or physical insurance card/certificate
    • Any premium payment receipt or renewal reminder SMS
    • The insurer’s mobile app or web portal, once you log in
    • Your policy document (declarations page), usually a PDF you can download anytime

    If even one of these has survived — an old email, a WhatsApp forward from your agent, a bank statement showing the premium debit — you likely already have what you need without logging in anywhere.

    How to Find Your Car Insurance Policy Number Online?

    Here’s how to check car insurance policy number online when you don’t have your documents handy:

    1. Open your insurer’s app or website and click “Customer Login” or “My Policies.”
    2. Log in with your registered mobile number and the OTP sent to it — most Indian insurers have dropped passwords in favour of OTP login.
    3. Your active policies will list under your name, each with its policy number clearly shown. You should also regularly check car insurance validity online to make sure your policy is active before renewal or claims.
    4. Tap or click on the specific policy to view the full document, which you can also download as a PDF.

    This is also the process to find car insurance policy number online and find my car insurance policy number online if you’re a first-time user — you’ll just need to complete a one-time registration with your mobile number and vehicle/engine number before the portal recognises you.

    No login access and no documents at all? If it’s a motor policy, visit the government’s Vahan e-service portal, enter your vehicle’s registration number, and it will show your current insurer’s name and policy validity — from there, a quick call to that insurer with your registration number is usually enough for them to pull up the exact policy number.

    How to Find Your Bike Insurance Policy Number Online?

    Two-wheeler owners often ask where can I find my bike insurance policy number online, especially right after a renewal when the new number hasn’t been memorised yet. The process mirrors car insurance:

    1. Log in to your insurer’s app or portal with your registered mobile number.
    2. Open “My Policies” and select your two-wheeler policy.
    3. The policy number appears at the top of the policy summary, along with the validity dates. Bike owners can also check bike insurance validity online to confirm coverage details anytime.

    If you’re wondering how to find my bike insurance policy number online or simply how to find bike insurance policy number online without an app login, the same Vahan portal trick works here too — just search using your bike’s registration number instead of a car’s.

    How to Check National Insurance Policy Number Online?

    National Insurance Company (NIC), one of India’s public sector general insurers, runs its own customer portal separate from private insurer apps. If you’re asking how to check National Insurance policy number online, here’s the process:

    1. Go to the official National Insurance website and click “Customer Login.”
    2. Registered users log in with their Customer ID and password; new users register with their name, mobile number, and email ID first.
    3. Once logged in, your policy list, including the policy number, appears on the dashboard.
    4. Alternatively, call NIC’s toll-free customer care number and provide your name and mobile number to have an executive read out your policy details.

    Max Life Insurance Policy Status Online by Policy Number

    Max Life Insurance now operates as Axis Max Life Insurance following its rebrand, but the customer portal works the same way it always has. If you’re looking to check Max Life insurance policy status online by policy number:

    1. Visit the official Axis Max Life website and click “Customer Login.”
    2. Select “Track Application” or “View Policy Details” from the dropdown.
    3. Enter your registered mobile number, email, or existing policy number along with your date of birth.
    4. Your policy status, due dates, and sum assured will display once verified. Existing customers can also use the Max Life Insurance login portal to manage policy details online.

    If you don’t yet have your policy number to start this search, an SMS or a call to the toll-free helpline (using your registered mobile number) is enough for the insurer to look it up on their end and share it with you.

    Managing more than one policy and losing track of the numbers? E-Insure First can help you organise all your policies in one place — no charge for the first consultation.

    Real-World Scenarios

    Situation 

    What to Do 

    You’re at the scene of an accident and need your policy number instantly 

    Open your insurer’s app — the digital policy card is accepted as valid proof in almost every state 

    You’ve switched phones and lost your saved documents 

    Search your email for the insurer’s name; the original confirmation email almost always has it 

    You bought the policy through an agent and never got login access 

    Call the insurer’s customer care with your name, mobile number, and vehicle/DOB details to complete registration 

    The policy was bought years ago and the account details are forgotten 

    Use “Forgot Customer ID” or “Forgot Policy Number” on the insurer’s login page — it typically only needs your registered mobile or email 

    Common Mistakes to Avoid

    • Confusing your policy number with your customer ID. Many insurers assign a separate customer/account ID for login and a different number for the actual policy — check which field the form is asking for.
    • Using an old, deactivated mobile number. OTP-based logins fail silently if your number has changed and you haven’t updated it with the insurer — this is the single biggest reason people get stuck.
    • Assuming a lapsed policy has “disappeared.” Expired or lapsed policies still show up in your portal history; you don’t need an active policy to view an old policy number.
    • Searching only the inbox, not spam or promotions folders. Renewal and confirmation emails often land outside the primary inbox.

    Expert Tips

    • Save a screenshot of your digital policy card right after purchase or renewal — it’s the fastest lookup you’ll ever have.
    • If you manage multiple policies across insurers, keep a single note (physical or digital) listing just the insurer name and policy number for each — you’ll need it far more often than you’d expect, especially at renewal time. Understanding the complete insurance claim process also helps you stay prepared when using your policy details.
    • For motor policies specifically, your vehicle registration number is often a faster starting point than trying to remember login credentials, since it’s a fixed identifier tied to your Vahan/RC record.

    Final Verdict

    Whether you’re trying to check car insurance policy number online, locate a two-wheeler policy, or check something like Max Life insurance policy status online by policy number, the fix is almost always the same: your insurer’s app or portal, your email inbox, or a five-minute call to customer care. The one Indian-specific shortcut worth remembering is the Vahan portal for motor policies — it works even when you have zero paperwork left. Bottom line on how to find insurance policy number online: start with your phone before you start searching drawers.

    Want a second pair of eyes on your policy details before renewal? Talk to E-Insure First — we’ll help you review coverage, not just find a number.

    Frequently Asked Questions

    How do I find my insurance policy number online if I forgot my login details?

    Use the “Forgot Customer ID” or “Forgot Password” option on your insurer’s login page — it usually just needs your registered mobile number or email to send you a reset link or OTP.

    Can I find my car insurance policy number using just my vehicle number?

    Yes, for motor insurance. The government’s Vahan e-service portal lets you search by vehicle registration number and will show your current insurer and policy validity, which you can then use to request the exact policy number from that insurer.

    Is my policy number the same as my claim number?

    No. Your policy number is permanent and stays the same for the life of your policy. A claim number is generated separately, only when you file a specific claim, and applies only to that incident.

    Where can I find my bike insurance policy number if I bought it through an agent?

    Check the confirmation SMS or email sent at purchase, or call your insurer’s customer care with your registered mobile number and vehicle details — they can look it up and also help you set up online portal access going forward.

    Does my policy number change when I renew my policy?

    It depends on the insurer. Some retain the same policy number across renewals, while others issue a new number each year — always check your latest renewal document rather than assuming the old number still applies.

    About E-Insure First: E-Insure First is an independent insurance advisory platform led by Director Sunil Goyal, helping Indian policyholders compare, buy and manage general and life insurance policies. This article reflects publicly available information from insurer websites and portals as of July 2026 and is updated periodically. It does not replace guidance from your insurer — always verify policy-specific details directly with them.

  • HDFC ERGO Claim Login 2026: Register a Claim, Check Claim Status & HCS Portal Guide

    HDFC ERGO Claim Login 2026: Register a Claim, Check Claim Status & HCS Portal Guide

    Written by the E-Insure First Content Team | Reviewed by Sunil Goyal, Director, E-Insure First | Last updated: July 2026

    Quick Answer:

    There isn’t just one HDFC ergo claim login. HDFC ERGO runs different portals for different people. Individual policyholders use the self-help portal at selfhelp.hdfcergo.com to register a new claim or check an existing one with an OTP, while the HDFC ergo health claim services login (the HCS portal) is meant for HR admins, intermediaries, employees under group policies, and network hospitals. Knowing which one applies to you saves a lot of wasted clicks.

    If you’ve typed “claim HDFC ergo login” into Google and landed on three different-looking pages, you’re not doing anything wrong — HDFC ERGO genuinely does run more than one claim portal, and most articles online don’t bother explaining which one you actually need. This guide sorts that out product by product, so you land on the right login the first time. If your claim is already submitted, you can also learn how to check HDFC ERGO claim status online to track approval stages, documents, and settlement updates.

    Not sure which portal your policy needs? Message E-Insure First — send us your policy type and we’ll point you to the exact login page.

    First, the Part Most Articles Skip: There Are Two Different “Claim Logins”

    Before you go hunting for a password, it helps to know that HDFC ERGO’s claim-related logins split into two clearly different systems, built for two different audiences:

    Portal 

    Who It’s For 

    What You Log In With 

    Self-Help Claim Portal (selfhelp.hdfcergo.com

    Individual policyholders — car, bike, health, travel, home 

    Policy/claim number + registered mobile OTP 

    Health Claim Services (HCS) Portal 

    HR admins, corporate intermediaries, employees on group health policies, network hospitals 

    User ID + password (role-based: HR, Intermediary, Employee, Hospital) 

    If you bought your own car, bike or health policy directly, you almost certainly want the self-help portal below — not the HCS login, which is built for corporate group-policy administration rather than everyday retail claims.

    HDFC ERGO Login Claim Registration: For a Brand-New Claim

    This is the starting point if you haven’t raised a claim yet and need to complete hdfc ergo login claim registration:

    1. Go to the official Claim Registration page on the self-help portal.
    2. Select your product — car, bike, health, travel, or home insurance.
    3. Enter your policy number, registered mobile number, and the incident details.
    4. Verify with the OTP sent to your phone — HDFC ERGO’s retail portals don’t use a traditional password, which actually cuts down on login trouble.
    5. Once submitted, you’ll receive a claim number. Save it, because it’s what every future login and status check will run on.

    Claims HDFC ERGO Login: Tracking an Existing Claim

    If you’ve already registered a claim and just want to log back in and check where things stand, this is the claims hdfc ergo login flow you’re looking for:

    1. Visit the Claim Status section of the self-help portal, or open the HDFC ERGO app.
    2. Enter your existing claim number or policy number.
    3. Complete the OTP verification tied to your registered mobile number.
    4. You’ll see your claim stage — registered, under survey, documents pending, approved, or settled.

    This is the same underlying hdfc ergo claim login account you created at registration — there’s no separate sign-up needed to check status later.

    HDFC ERGO Health Claim Services Login: Who This Is Actually For

    This is the one people most often click into by mistake. The hdfc ergo health claim services login (hosted on the HCS portal at claims.hdfcergo.com) is a role-based login built for corporate and group health insurance administration, with four separate login types: HR, Intermediary, Employee, and Hospital. If you bought an individual health policy on your own, this generally isn’t the login you need — go back to the self-help portal above instead. While managing medical policies, it is also useful to understand what is TPA in insurance and how third-party administrators support health claim processing.

    Here’s who each role is for, based on how the portal itself is structured:

    • HR Login: For a company’s HR team managing claims under a corporate group health policy, using their HDFC ERGO Corporate HR credentials.
    • Intermediary Login: For brokers or corporate intermediaries handling claims on behalf of client organisations.
    • Employee Login: For employees covered under an employer’s group policy, signing in with their HDFC ERGO card number.
    • Hospital Login: For network hospitals coordinating cashless approvals and pre-authorisation directly with HDFC ERGO.

    If you’re an employee trying to check a claim from your company’s group policy, this is where the hdfc ergo health claim services login comes in — but you’ll need the employee card number your HR or insurance desk issued you, not your personal mobile number.

    HDFC ERGO Claim Intimation User Login: First-Time Users

    If this is your very first claim with HDFC ERGO, you might not have an account yet — that’s what the hdfc ergo claim intimation user login step is for.

    Intimation simply means informing HDFC ERGO that an incident (accident, hospitalisation, theft, and so on) has happened, and it’s what creates your claim file in the first place. You can complete this through the same self-help portal used for registration, or by calling customer care and having an executive log it for you over the phone.

    Once intimation is done, your login credentials for that claim — tied to your mobile number and claim number — are automatically active for every future check-in. New users should also understand the complete insurance claim process to avoid common mistakes during submission.

    First-time claim and not sure where to start? Get free guidance from E-Insure First before you file — it can save you a rejected form later.

    HDFC ERGO General Insurance Toll-Free Number for Claim Login

    Login trouble happens — OTP not arriving, mobile number changed, claim number misplaced. If self-service doesn’t work, the hdfc ergo general insurance toll free number for claim login issues is your backup:

    Purpose 

    Number / Channel 

    General customer care (claim & login help) 

    022-6158 2020 (chargeable, 24×7) 

    Landline (Delhi NCR) 

    011-6158 2020 

    Health claim services / HCS login support 

    022-6234 6234 / 0120-6234 6234 

    WhatsApp support 

    8169 500 500 

    Email support 

    care@hdfcergo.com (general), healthclaims@hdfcergo.com (health claims) 

    Numbers occasionally change, so it’s worth confirming the current one on HDFC ERGO’s official contact page before you dial. You can verify the latest contact details directly from the official HDFC ERGO customer support page before contacting the insurer.

    Common Login Problems and Quick Fixes

    • OTP not received: Confirm the mobile number on file matches the one you’re entering — a number changed after policy purchase is the most common cause.
    • “Claim not found” error: Double-check for a typo in the claim or policy number, and make sure you’re on the right portal for your product (retail vs. HCS). If you do not have your details available, you can also find your insurance policy number by vehicle number through online methods.
    • Employee login not working: Verify your HDFC ERGO card number with your company’s HR or insurance desk — this is different from a personal policy number.
    • Still stuck: Call 022-6158 2020 for retail claims, or 022-6234 6234 for HCS/group policy login issues.

    Frequently Asked Questions (FAQs)

    What is the correct HDFC ERGO claim login for an individual policy?

    Use the self-help portal at selfhelp.hdfcergo.com to register a new claim or check an existing one. It only needs your policy/claim number and an OTP — no separate password required.

    Is the HDFC ERGO Health Claim Services login the same as the regular claim login?

    No. The Health Claim Services (HCS) login is built for HR teams, intermediaries, employees under group policies, and network hospitals — not for individually purchased retail policies.

    Do I need to create an account before registering a claim?

    Not separately. Completing claim intimation through the self-help portal automatically creates the login you’ll use for that claim going forward, tied to your registered mobile number.

    What number should I call if I can’t log in to check my claim?

    For individual policies, call 022-6158 2020. For Health Claim Services (HR/Intermediary/Employee/Hospital) login issues, call 022-6234 6234 or 0120-6234 6234.

    Can I register and track a claim from the HDFC ERGO app instead of the website?

    Yes. The HDFC ERGO app supports the same claim registration and tracking flow as the self-help website, using your policy number and OTP.

    Still not sure which HDFC ERGO login applies to your policy? Talk to E-Insure First — we’ll sort it out in one message. Policyholders comparing insurers can also explore Star Health Insurance vs HDFC ERGO to understand differences in coverage and services.

    About E-Insure First: E-Insure First is an independent insurance advisory platform led by Director Sunil Goyal, helping Indian policyholders compare, buy and manage general and health insurance policies. This article is based on publicly available information from HDFC ERGO’s official website and self-help/claims portals, and is updated periodically as HDFC ERGO’s processes change. It does not replace guidance from HDFC ERGO or your policy documents — always verify claim-specific details directly with the insurer.

  • How to Renew Car Insurance After Expiry (2026 Guide)

    How to Renew Car Insurance After Expiry (2026 Guide)

    Written by the E-Insure First Content Team | Reviewed by Sunil Goyal, Director, E-Insure First | Last updated: July 2026

    Quick Answer:

    To renew car insurance after expiry, go to your insurer’s website or app, enter your registration number, and complete the renewal payment. If it’s been less than 90 days since expiry, most insurers will renew you online without much fuss and your No Claim Bonus stays intact. If it’s been longer, you’ll usually need to complete a quick vehicle inspection — often just a video walkaround uploaded through the app — before the new policy is issued, and your NCB resets to zero.

    Realising your car insurance has expired is one of those small panics that hits at the worst time — usually right as you’re about to leave for work. The honest first step is: don’t drive the car until it’s sorted, since third-party cover is legally mandatory in India. The good part is that how to renew car insurance after expiry isn’t as complicated as it sounds, and in most cases you can do the entire thing from your phone in under 15 minutes. This guide walks through exactly what changes based on how long your policy has been lapsed, and what to expect at each stage.

    Before renewing, you can also quickly check car insurance validity online to confirm your policy status and expiry details. Not sure if your policy needs an inspection or just a quick payment? Ask E-Insure First — tell us your expiry date and we’ll tell you exactly what to expect.

    What Actually Happens When Your Car Insurance Expires

    Your car isn’t covered the moment the policy lapses — there’s no automatic buffer period during which you’re still insured. What most people call a “grace period” is really just a window (commonly up to 90 days) during which your insurer will let you renew without wiping out your No Claim Bonus. During that window, you’re still driving uninsured; you just haven’t lost your discount history yet. Two things happen depending on how long you wait:

    • Within 90 days of expiry: Renewal is usually quick, your NCB is protected, and some insurers may still ask for a basic inspection depending on how many days have passed.
    • Beyond 90 days: This is treated as a full break-in period. Your accumulated NCB resets to zero, a vehicle inspection becomes mandatory, and the premium is recalculated as if you’re buying fresh cover.

    Understanding what is NCB in car insurance can help you know how this discount works during renewal.

    Step-by-Step: How to Renew Car Insurance Policy After Expiry

    Here’s the process most Indian insurers follow for how to renew car insurance policy after expiry, whether you’re a few days or a few months late:

    1. Go to your insurer’s website or app and select “Renew Policy,” entering your registration number or old policy number.
    2. Check your renewal quote. If it’s within the 90-day window, your NCB slab should show correctly. If it’s showing 0% and you know you had a claim-free record, that’s your signal the lapse has crossed 90 days.
    3. Complete the inspection if asked. For shorter lapses, many insurers skip this. For longer ones, you’ll typically be asked to upload a short video walkaround of the car — covering all four sides, the odometer, and any visible damage — through the app.
    4. Wait for inspection approval, which for digital self-inspections usually takes a few hours, not days.
    5. Pay the premium and choose your add-ons — zero depreciation, roadside assistance, engine protection, and so on.
    6. Download your new policy PDF immediately after payment; it’s valid as proof of insurance from that moment. If you ever lose your document, you can also learn how to download insurance copy by vehicle number online.

    Real-World Scenarios

    Situation 

    What Happens 

    Policy expired 2 days ago, no claims last year 

    Instant online renewal, NCB carried forward, inspection rarely required 

    Policy expired 45 days ago 

    Online renewal possible, some insurers may ask for a quick self-inspection, NCB still protected 

    Policy expired 120 days ago 

    Mandatory inspection (physical or video), NCB resets to zero, premium recalculated as a fresh policy 

    Car was in a minor accident during the lapsed period 

    Inspection will likely flag the damage; insurer may ask for repair proof or adjust terms before issuing cover 

    You want to switch insurers instead of renewing with the old one 

    Still possible — request an NCB certificate from your previous insurer and declare it with the new one 

    Grace Period vs. Break-In Period: Quick Comparison

    Factor 

    Within 90 Days (Grace Window) 

    Beyond 90 Days (Break-In Period) 

    Vehicle covered during the gap? 

    No 

    No 

    NCB status 

    Protected, carries forward 

    Reset to zero 

    Inspection required? 

    Sometimes, insurer-dependent 

    Almost always mandatory 

    Premium impact 

    Usually unchanged 

    Often higher, calculated as fresh cover 

    Can you claim during this time? 

    No — policy is inactive 

    No — policy is inactive

    Documents You’ll Likely Need

    Vehicle owners can also verify registration-related details through the official Parivahan portal managed by the Government of India.

    • Vehicle Registration Certificate (RC) copy
    • Previous policy copy or policy number, if available
    • A valid ID and address proof (for first-time renewal on a new insurer’s portal)
    • NCB certificate from your previous insurer, if you’re switching insurers
    • Inspection photos or video, if requested by the insurer

    Common Mistakes to Avoid

    • Driving the car “just once” before renewing. Third-party insurance is legally mandatory under the Motor Vehicles Act — driving with an expired policy can attract a fine, and any accident during that gap is entirely out of pocket. You can refer to the official Ministry of Road Transport and Highways portal for updates related to vehicle rules and motor regulations in India.
    • Assuming the 90-day window means you’re still covered. It only protects your NCB, not your car. There’s no insurance cover during a lapse, however short.
    • Skipping the inspection step and expecting instant approval. If your insurer’s portal is asking for photos or a video, the policy won’t be issued until that’s cleared — don’t wait until the last minute again.
    • Not checking your NCB slab before paying. If it shows 0% and you believe you had accumulated a bonus, query it before completing payment rather than after.
    • Renewing blindly with the same insurer out of habit. A lapsed renewal is also a natural point to compare a couple of quotes, since you’re already going through a fresh-pricing exercise anyway. Many users now prefer comparing online vs offline car insurance options before making a renewal decision.

    When Renewing Might Not Be the Right Call

    If your policy has lapsed for a long stretch and your car has meanwhile picked up damage, unresolved mechanical issues, or you’re planning to sell the vehicle soon, it’s worth pausing before you renew. In these cases, a fresh quote comparison across two or three insurers — rather than a same-insurer renewal — often makes more financial sense, since you’re being priced as a new policy either way.

    Weighing whether to renew with your current insurer or switch after a lapse? E-Insure First can compare both so you’re not guessing.

    Expert Tips

    • Be sure to set an alert for 15 days prior to the expiry, not on the actual expiry day to be able to work through a delay on the portal or if a last minute inspection is needed.
    • If you’re within the 90-day window, don’t delay further just because there’s technically “time left.” Every extra day increases the odds of an inspection being requested.
    • Keep your NCB certificate saved separately from your policy documents — it’s the one piece of paper that protects years of accumulated discount if you ever switch insurers.
    • If an insurer’s self-inspection video keeps getting rejected, check lighting and make sure the odometer reading is clearly visible — this is the most common reason for automated rejections.

    Final Verdict

    Renewing after expiry isn’t complicated, but timing changes everything. If you act within 90 days, you’ll likely get a fast, low-friction renewal with your NCB intact. Wait longer, and you’re looking at an inspection and a bigger bill. The honest answer to how to renew car insurance after expiry is simple: do it the moment you notice, skip driving until it’s done, and treat every day past the 90-day mark as money quietly leaving your pocket. Along with renewal timing, knowing what is insurance renewal helps you better understand policy continuation and coverage.

    Lapsed policy and want a quote comparison before you commit? Get a free comparison from E-Insure First — takes less time than the inspection itself.

    Frequently Asked Questions

    Can I renew my car insurance online if it has already expired?

    Yes, it is. The renewal is an online procedure if the policy has not expired or has been expired for not more than 90 days. If you have the vehicle inspection to get the policy issued If the policy has expired beyond 90 days, get ready for a mandatory inspection.

    How long can I wait before renewing without losing my No Claim Bonus?

    Generally up to 90 days from the expiry date. After that, your accumulated NCB resets to zero, regardless of your previous claim-free record.

    Is it illegal to drive with expired car insurance?

    Yes. Motor third-party insurance is a compulsion by law as mentioned in the Motor Vehicle Act 1988. You can be fined and the damage during this period won’t be compensated for any damage/liability incurred while you have been driving without a policy.

    Do I always need an inspection to renew after expiry?

    Not always. Short lapses of a few days often skip inspection entirely. Longer lapses, especially past 90 days, almost always require one — usually a self-inspection video through the insurer’s app.

    Can I switch insurers when renewing an expired policy?

    Yes. Get NCB certificate from your previous insurer, and then mention the certificate at the time of buying the new policy. NCB belongs to you, the policy holder, not to the car nor the insurance company.

  • HDFC ERGO Claim Status Check: How to Track Your Claim Online (2026 Guide)

    HDFC ERGO Claim Status Check: How to Track Your Claim Online (2026 Guide)

    Written by the E-Insure First Content Team | Reviewed by Sunil Goyal, Director, E-Insure First | Last updated: July 2026

    Quick Answer:

    To do a HDFC ERGO claim status check, go to the HDFC ERGO self-help portal or the “Track Claim Status” page on hdfcergo.com , choose your product (car, bike or health), and enter your claim/policy number along with your registered mobile number or date of birth. You can also check HDFC ergo claim status through the HDFC ERGO mobile app, by calling their customer care line, or by messaging their WhatsApp support number.

    When your car, bike, or health claim is hovering between “Submitted” and “Settled”, it’s the not knowing that drives you crazy. But an HDFC Ergo claim status check can be done in less than 2 minutes if you know where to click and which support channels HDFC ERGO has-not what Google might tell you. All steps have been taken directly from HDFC Ergo’s actual claims sections.

    Confused about which document your claim needs next? Talk to an E-Insure First advisor—we’ll help you read your policy and push your claim forward. If you’re filing a health insurance claim through another insurer, you can also learn how to claim Star Health Insurance.

    Why You’d Want to Check Claim Status HDFC ERGO Regularly

    Insurers process thousands of claims a day, and a status check tells you exactly where yours stands — whether it’s with the surveyor, awaiting a document, approved, or already settled. Catching a “documents pending” flag early can save you a week of waiting, because HDFC ERGO won’t move a claim forward until the missing paperwork lands in their system.

    4 Ways to Check HDFC ERGO Claim Status

    HDFC ERGO offers multiple ways to track your insurance claim, making it easy to stay updated on your claim progress. Whether you prefer using the online self-help portal, mobile app, customer care, or WhatsApp support, each method provides quick access to your latest claim status. Choose the option that’s most convenient for you and follow the steps below.

    Method Time Required Best For
    Self-Help Portal 2 Minutes Fastest online tracking
    HDFC ERGO Mobile App 2 Minutes Mobile users
    Customer Care 5–10 Minutes Assistance with claim queries
    WhatsApp Support 2–5 Minutes Quick status updates
    Branch Visit Depends on branch Complex claim issues

    1. HDFC ERGO Self-Help Portal (Fastest Way to Check HDFC ERGO Claim Status Online)

    This is the method HDFC ERGO itself recommends, and it’s the quickest route for a HDFC ergo claim status check online:

    1. Go to the official HDFC ERGO Claim Status page on the self-help portal.
    2. Select your insurance type — Car, Bike, or Health.
    3. Enter your claim number (or policy number) along with your registered mobile number, email, or date of birth, depending on the product.
    4. Submit the OTP sent to your registered mobile number.
    5. Your current claim stage — registered, under survey, documents pending, approved, or settled — will appear on screen.

    Separate tracker links exist for car insurance claims, bike insurance claims, and health insurance claims — use the one matching your policy. If your policy is managed through a TPA, you may also need to check your FHPL claim status separately.

    2. HDFC ERGO Mobile App

    If you’d rather not log in on a browser every time, this is how to HDFC ergo check claim status from your phone: download the HDFC ERGO app from the Play Store or App Store, log in with your policy number and registered mobile number, and open the “Track Claim” section from the home screen. The app shows the same real-time status as the website and also lets you upload pending documents directly from your gallery. If your claim is handled by another TPA, you can also check the Heritage TPA claim status online.

    3. Customer Care Call

    Prefer talking to a person? You can check claim status HDFC ergo by calling their customer service line at 022-6158 2020 (chargeable, accessible 24×7 as per HDFC ERGO’s official contact page). Keep your policy number and claim number ready so the executive can pull up your file immediately.

    4. WhatsApp and Branch Visit

    HDFC ERGO also offers WhatsApp-based assistance on 8169 500 500 for policy and claim queries — useful when you just want a quick text-based update instead of a call. If your query is more complex, walking into your nearest HDFC ERGO branch with your policy documents and claim reference number works too; you can find your closest branch through the branch locator on hdfcergo.com.

    Not sure which claim status method fits your case (motor vs. health vs. group policy)? Ask E-Insure First — we’ll point you to the right tracker in under a minute.

    How to Check HDFC ERGO Claim Status Step by Step (Car Insurance Example)

    Here’s exactly what happens if you’re wondering how to check HDFC ergo claim status for a car insurance claim specifically:

    1. Open the Track Car Insurance Claim page.
    2. Enter your claim number or policy number.
    3. Verify with the OTP sent to your registered mobile.
    4. View the live status — claim registered, surveyor assigned, survey completed, approved for repair, or amount settled.

    Health and bike claims follow the same broad flow, just on their own dedicated tracker pages linked above.

    What Each HDFC ERGO Claim Status Stage Means

    Status Shown 

    What It Means 

    Claim Registered 

    Your claim intimation has been received and logged in the system. 

    Surveyor Assigned 

    A surveyor has been allocated to assess the damage or loss. 

    Documents Pending 

    HDFC ERGO is waiting on a document from you — check email/app for the exact list. 

    Under Assessment 

    The claim amount is being calculated based on the survey report and policy terms. 

    Approved 

    The claim has been sanctioned; payment or repair authorization is being processed. 

    Settled/Closed 

    Payment has been made to you or the garage/hospital, and the claim file is closed. 

    Claim Status Not Updating? Try This

    • Double-check the claim number — a typo is the most common reason a status check fails.
    • Confirm your registered mobile number is the one you’re entering; OTPs won’t reach an old number.
    • Give it 24–48 hours after document submission before assuming there’s a delay — internal updates aren’t always instant.
    • If the status hasn’t moved in over a week, call the customer care number above or raise it through the grievance tracker.

    Conclusion

    Keeping track of your claim regularly helps you identify pending documents, survey updates, and settlement progress without unnecessary delays. Whether you choose the HDFC ERGO self-help portal, mobile app, WhatsApp support, or customer care, checking your claim status only takes a few minutes. If you still face delays or need help understanding your claim status, E-Insure First can guide you through the next steps and help you resolve common claim-related issues.

    Frequently Asked Questions (FAQs)

    How do I check my HDFC ERGO claim status online?

    Visit the HDFC ERGO self-help portal, select your insurance type, and enter your claim or policy number with your registered mobile number to complete a HDFC ergo claim status check online in under two minutes.

    Can I check HDFC ERGO claim status without logging in?

    Yes. The claim status trackers on hdfcergo.com only need your claim/policy number and an OTP verification — no separate account login is required.

    What number do I call to check the claim status of HDFC ERGO?

    For queries, give HDFC ERGO’s helpline a ring on 022-6158 2020, listed on their website’s contact page as a chargeable call, available around the clock. Have the claim number ready.

    How long does HDFC ERGO take to settle a claim?

    Timelines vary by product and claim type — cashless health claims are typically approved faster than reimbursement claims, and motor claims depend on survey and repair turnaround. Checking your status regularly is the best way to track your specific timeline.

    Why is my HDFC ERGO claim status showing “documents pending”?

    HDFC ERGO requires more documents from you then for your policy to be activated Log in on the app or the self help portal and check for list of documents or call us on customer care

    Stuck on a claim and don’t know who to escalate to? E-Insure First can guide you through the grievance process — no charge for the first consultation.

  • How to Cancel A Health Insurance Policy in India – Your Complete, Honest Guide

    How to Cancel A Health Insurance Policy in India – Your Complete, Honest Guide

    Written by the E-Insure First Content Team | Reviewed by Sunil Goyal, Director, E-Insure First | Last updated: June 2026

    Quick Answer:

    You can cancel a health insurance policy at any time during the policy term. If you cancel within the free look period (30 days for policies issued after April 1, 2024), you get most of your premium back after applicable deductions. After the free look period, refunds are calculated on a short-rate basis. Submit a written request to your insurance company, fill the official cancellation form, attach documents, and the refund amount is typically processed within 7–15 business days.

    So you bought a health insurance plan, and now — for whatever reason — you want to know how to cancel a health insurance policy in India.

    Maybe the agent oversold it. Maybe you found a better policy with lower premiums and wider coverage. Maybe life changed: you got a new job with group health cover, or a family floater you thought made sense no longer does.

    Whatever the reason, you’re here with one question: how do I cancel this policy and get my money back?

    The good news is that cancelling a health insurance policy in India is absolutely possible. IRDAI has clear rules protecting you — including a powerful tool called the free look period that most people don’t even know exists. However, the refund amount depends largely on when you submit your cancellation request. Before cancelling, it’s also important to understand the benefits of health insurance in India and whether switching your plan may be a better option. Before cancelling, it’s also important to understand the benefits of health insurance in India and whether switching your plan may be a better option.

    This guide covers the end-to-end cancellation process, steps specific for insurers such as Star Health, Tata AIG, Aditya Birla, HDFC ERGO, ICICI Lombard, SBI, the calculation of refunds and mistakes that make you lose out.
    So here we go.

    Can You Actually Cancel a Health Insurance Policy in India?

    Yes, you can cancel your health insurance policy in India anytime. IRDAI regulations allow policyholders to cancel their health insurance policies during the policy term. You do not need to provide a complicated justification for cancelling your policy. You don’t need your agent’s approval.

    Inform your insurer in writing and follow the cancellation procedure mentioned in your policy document. However, the refund amount depends on when you submit the cancellation request.

    What is the Free Look Period? (The Most Important Thing to Know)

    The free look period is your built-in “change your mind” window. It’s mandated by IRDAI and applies to all new health insurance plan purchases in India. Similar consumer protection principles also apply across various insurance products under standard insurance regulations.

    Following IRDAI’s latest amendment in 2024 (effective April 1, 2024), all health insurance policies issued now are mandated to carry a 30-day free look period. The previous policies, which were sold before the stipulated date, are expected to carry either a 15-day free look period, depending upon the channel of purchase.

    Here’s how it works:

    • The free look period starts from the date you receive your policy documents — not when you paid.
    • During this window, you can cancel your health insurance policy for any reason — no questions asked (though the insurer may ask for feedback).
    • You get your premium amounts refunded, minus some small deductions.
    • If you’ve already made a claim during this period, cancellation is not permitted.
    • The free look period does NOT apply to renewals or policy portability — only fresh purchases.

    The free look period allows policyholders to review their coverage and cancel if the policy does not meet their expectations.

    How Much Refund Will You Get? — The Complete Refund Table

    This is what everyone really wants to know. Here’s the honest breakdown:

    During the Free Look Period (Within 30 Days of Receiving Policy)

    What Gets Deducted 

    Details 

    Medical examination costs 

    If any pre-policy tests were done, the insurer deducts the cost (often 50% if tests are recurring at renewal) 

    Stamp duty 

    A nominal government charge — usually ₹50–₹200 

    Proportionate risk premium 

    Premium for the days you were covered before cancellation 

    What You Get Back 

    Full premium minus the above — often 85–98% of what you paid 

    After the Free Look Period (Post-30 Days)

    After the free look period, refund is done on a short-period (proportionate) basis, which means the company will charge for the period which was already in force, along with a processing fee for cancellation.

    (These rates differ from company to company – refer to the terms & conditions of your policy).

    Cancellation Timing Expected Refund
    Within Free Look Period 85-98%
    Within 1 Month Around 75%
    Within 3 Months Around 50%
    Within 6 Months Around 25%
    After 6 Months Minimal or Nil

    Important: If you have made any claim during the policy period, the insurance company will deduct the claim amount from any refund amount — or in many cases, cancel the refund entirely.

    If the refund is delayed, IRDAI rules require insurers to pay interest (bank rate + 2%) on the refundable amount from the day they receive your request. This is automatic — you don’t have to ask for it.

    How to Cancel Health Insurance Policy — Step-by-Step

    Whether you’re cancelling during the free look period or later, the core steps to cancel remain largely the same:

    Step 1 – Read Your Policy’s Terms and Conditions

    Before doing anything, please read the cancellation clause in your sales brochure and policy document. Look for the cancellation process section — it tells you the notice period required, the refund formula, and any conditions-apply clauses specific to your plan.

    Step 2 – Contact Your Insurer’s Support Department

    Reach out to the support department of your insurer through any available channel — customer care number, email, WhatsApp chatbot, or branch visit. Inform them of your intent to cancel your health insurance policy.

    Step 3 – Submit a Written Request

    This is non-negotiable. Every insurer requires a written request — a formal letter or filled official cancellation form stating:

    • Your full name and policy number
    • Date of purchase and date of receiving the policy document
    • Reason for cancellation (required for their records — this is standard)
    • Your bank account details for refund

    Step 4 – Fill the Cancellation Form

    Most insurers have a dedicated cancellation form — downloadable from their website or available at their branch. Fill it accurately. Incomplete forms are the #1 reason cancellation requests are delayed.

    Step 5 – Submit Documents along with the form

    • Original policy copy or self-attested copy
    • Photo identity proof like Aadhaar Card or PAN Card
    • Bank account information or cancelled cheque to enable refund
    • Copy of FIR (only applicable in case the policy copy is lost, e.g., theft)

    Step 6 – Receive written acknowledgement

    Always make sure to obtain a written or digital confirmation of your policy cancellation. This could be helpful if the procedure takes longer than expected.

    Step 7- Track your refund

    Typically, a refund is credited within 7-15 business days after the insurer formally processes your policy cancellation. Contact the support desk in case there is a delay in the same.

    How to Cancel Online vs Offline

    Cancelling Online

    Many major insurers have digitised the cancellation process significantly in 2026. Here’s how online cancellation typically works:

    • Log in to your insurer’s website or app using your policy number
    • Navigate to “Policy Services” or “My Account”
    • Select the cancellation request option
    • Fill the digital cancellation form and upload documents
    • Submit and save the acknowledgement number

    Many insurers, including Star Health, ICICI Lombard, HDFC ERGO, and Niva Bupa, also accept cancellation requests via:

    • WhatsApp chatbots (increasingly common in 2026)
    • Email to the support department
    • Customer care call (follow up with a written email to create a paper trail)

    Cancelling Offline

    For those who prefer in-person:

    • Visit the nearest branch of your insurance company
    • Carry all original documents + photocopies
    • Submit the filled official cancellation form
    • Collect the acknowledgement slip

    Pro tip: Even if you initiate cancellation verbally or by phone, always follow up with a written request via email or registered post. Verbal requests alone may not be accepted as official cancellation triggers.

    How to Cancel Specific Insurer Policies

    How to Cancel Star Health Insurance Policy

    • Online: Email grievance@starhealth.in or log in to the Star Health portal
    • Customer care: 044-69006900
    • Offline: Visit any Star Health branch with your policy documents and filled cancellation form
    • Refunds are processed within 7–10 business days after the official cancellation is confirmed

    How to Cancel Tata AIG Health Insurance Policy

    • Online: Log in to tataaig.com and navigate to “My Account” → “Cancellation”
    • Email: customersupport@tataaig.com
    • Customer care: 1800-266-7780
    • Submit the written request along with KYC documents
    • Note: Free look period for Tata AIG allows cancellation within 30 days of policy receipt

    How to Cancel Aditya Birla Health Insurance Policy

    • Call: 1800-270-7000 (toll-free)
    • Email: care.healthinsurance@adityabirlacapital.com
    • Alternatively, visit your nearest Aditya Birla Health Insurance branch
    • Give at least 15 days’ notice in writing before the intended cancellation process begins
    • Refund is calculated on a short-period basis if beyond the free look period

    How to Cancel HDFC ERGO Health Insurance Policy

    • Online portal: hdfcergo.com → My Policies → Request Cancellation
    • Email: healthclaim@hdfcergo.com
    • Customer care: 022-6234-6234
    • Submit a written request with policy details and bank account information

    How to Cancel ICICI Lombard Health Insurance Policy

    • Online: Log in to ICICILombard.com → Self-Service → Policy Cancellation
    • Email: customersupport@icicilombard.com
    • Customer care: 1800-2666
    • Fill the official cancellation form either online or offline and submit KYC documents

    How to Cancel SBI Health Insurance Policy

    • Online: Log in to sbigeneral.in and submit the cancellation request through the “My Policy” section
    • Customer care: 1800-102-1111
    • Branch visit: Carry original policy + ID proof + bank details
    • For group health policies in TCS and other corporates, consult your HR department as the cancellation process may differ from retail policies

    Documents Required for Cancellation

    Regardless of the insurer, keep these documents ready:

    • Original policy document (or self-attested copy)
    • Filled official cancellation form (insurer-specific)
    • Government-issued photo ID (Aadhaar, PAN, Passport). Keeping your policy details handy is equally important, especially if you need help finding policy information before initiating cancellation.
    • Cancelled cheque or bank passbook copy (for refund credit)
    • Your written request/cancellation letter stating the reason
    • Acknowledgement of previous communications (if any)

    For online policies: having your registered mobile number and email ID handy is essential, as OTP-based verification is common.

    When Should You NOT Cancel? (Think Before You Act)

    Before you fire off that cancellation request, it’s worth pausing for a moment. Here’s when cancelling a health insurance plan is genuinely a bad idea:

    You have a waiting period almost done – Most health plans have a 2–4 year waiting period for pre-existing diseases. If you’re in year three, cancelling means that clock resets entirely when you buy a new policy.

    You have no alternate coverage lined up – In India, medical expenses for even basic hospitalisation have skyrocketed. A single emergency without a health plan can wipe out years of savings. Never cancel before your next plan is active.

    You just had a claim – Cancelling after a claim can raise flags and affect future policy purchases if insurers note frequent cancellations in their internal systems.

    You’ll lose your no-claim bonus – Some plans accumulate a no-claim bonus (NCB) of 5–50% that increases your sum insured for free. Cancellation wipes that out entirely.

    You’re switching because of a bad claim experience – Before cancelling, try filing a formal grievance with your insurer or approaching the IRDAI Bima Bharosa portal. Many disputes are resolved without needing to cancel.

    Alternatives to Cancellation — Port, Don’t Quit

    Here’s a smarter move that most people don’t consider: portability. Many policyholders prefer switching insurers through the health insurance portability process rather than cancelling coverage completely.

    IRDAI’s portability rules allow you to switch from one health insurance plan to another insurer without losing your accumulated waiting period credits. So if you’ve served 2 years on a 4-year pre-existing disease waiting period, you carry those 2 years to your new insurer.

    When to port instead of cancel:

    • You’re unhappy with your current insurer’s service but want to keep coverage
    • You found a better plan with more coverage at a similar premium amount level
    • Your medical expenses needs have changed (e.g., you want higher sum insured)
    • You want to add more health insurance plan features like OPD cover or day-care procedures. You can also explore healthcare initiatives and insurance-related information available through the National Health Authority (NHA).

    At E-Insure First, we can help you compare and port your health plan to a better insurer — without the risk of a coverage gap.

    Common Mistakes to Avoid

    Cancelling before reading the terms and conditions

    Always please read the terms and conditions in your sales brochure before initiating the cancellation process. Some plans have specific cancellation windows and conditions that trip people up.

    Missing the free look period deadline

    The 30-day clock starts from receipt of the policy document — not the date you paid. Don’t confuse the two. Missing this window by even a day can cost you a significant portion of your premium amounts.

    Not submitting a written request

    Calling customer care and saying “I want to cancel” is not enough. Always follow up with a written request by email or registered post to create an official paper trail.

    Forgetting to get acknowledgement

    Without a timestamped acknowledgement of your cancellation request, you have no proof of when you submitted it. This matters a lot if a refund amount dispute arises later.

    Cancelling without having new coverage ready

    There is no “pause button” on medical expenses. Never cancel your health insurance plan unless your replacement policy is already active.

    Not mentioning the reason clearly

    While insurers can’t refuse cancellation, stating a vague reason can slow down processing. Be clear — “found a better plan,” “coverage doesn’t match needs,” or “policy was mis-sold” are all valid and clear.

    Relying on your agent to submit the form. Always submit the cancellation request directly to the insurance company — not through an intermediary. Delays caused by agents can mean you miss the free look period window.

    Expert Tips from E-Insure First

    • The moment your policy document arrives, read it. Set a reminder for Day 25 of receipt — that gives you 5 days to decide and submit a cancellation request within the 30-day free-look period window comfortably.
    • Always cancel via email + registered post simultaneously for high-value policies. This gives you two timestamped paper trails, which is valuable if the refund amount is delayed.
    • Ask specifically whether a claim has been registered before cancelling. Sometimes a cashless pre-authorisation counts as a claim — find out before submitting the written request.
    • Compare before you cancel. Use E-Insure First to check if a better health insurance plan exists before pulling the trigger on cancellation. You might be surprised — a small increase in premium amounts could give you dramatically better coverage.
    • If your insurer delays the refund, cite IRDAI’s regulation: they are required to pay interest (bank rate + 2%) on the refund amount from the date they received your request. Mentioning this firmly usually accelerates the process.
    • For group or corporate health policies (like health insurance in TCS or other employers), the cancellation process is different — always go through your HR or support department first, as individual cancellation may not apply.

    Conclusion

    Cancelling a health insurance policy isn’t complicated — but it does reward those who know the rules and move quickly. The free look period is your strongest tool: 30 days from receiving your policy document to review, reflect, and walk away with most of your premium amounts intact. After that, the cancellation process is still available, but the refund amount shrinks with time.

    Whether you’re cancelling Star Health, Tata AIG, Aditya Birla, HDFC, ICICI Lombard, or any other insurer — the core formula is the same: read the terms and conditions, submit a clear written request, collect your acknowledgement, and follow up until your refund amount arrives.

    And if you’re cancelling because you found a better deal? Let E-Insure First help you compare and switch smartly — because in the world of health insurance plans, the best decision is rarely “no insurance.” It’s “better insurance.”
    Compare the best health plans and port your policy without losing your waiting period benefits at einsurefirst.com

    Key Takeaways

    1. You can cancel your health insurance policy at any time in India — IRDAI guarantees this right.
    2. The free look period is 30 days (for all new policies issued after April 1, 2024) from the date of receiving your policy document — not the payment date.
    3. During the free look period, you get almost all your premium amounts back, minus stamp duty, medical exam costs, and risk premium for days covered.
    4. After the free look period, refunds are calculated proportionately — the longer you wait, the less you get back.
    5. Always submit a written request — verbal or phone requests alone won’t trigger an official cancellation.
    6. If the refund is delayed, IRDAI mandates interest payment (bank rate + 2%) from the date of your request.
    7. Before cancelling, consider portability — you can switch insurers without losing your waiting period credits.
    8. Never cancel until your replacement health insurance plan is already active — gaps in coverage are dangerous.

    Frequently Asked Questions (FAQs)

    How do I cancel my health insurance policy in India?

    To cancel your health insurance policy, contact your insurer’s support department via phone, email, or branch visit, fill the official cancellation form, and submit a written request with your policy details and bank information. Give at least 7 days’ notice. The cancellation process is typically completed within 7–15 business days.

    What is the free look period in health insurance?

    The free look period is an IRDAI-mandated window during which you can review and cancel your health insurance policy without penalty. As of April 1, 2024, all new health insurance plans in India come with a 30-day free look period from the date of receiving policy documents. The insurance company will deduct only stamp duty, medical test costs, and proportionate risk premium before refunding the rest.

    Will I get a full refund if I cancel during the free look period?

    Almost. The refund amount during the free look period is your full premium minus stamp duty, any pre-policy medical examination fees, and the proportionate premium amounts for the days you were covered. In most cases, policyholders receive 85–98% of their paid premium back within the 30-day window.

    What happens to the refund if I cancel after the free look period?

    The insurance company will deduct the risk premium for the period already covered, plus an administrative fee. The refund amount typically works out to approximately 75% if cancelled within 1 month, 50% within 3 months, and 25% within 6 months. After 6 months, most of the premium may be consumed by the risk premium, leaving little to no refund amount.

    How do I cancel my Star Health Insurance policy?

    To cancel your health policy from Star Health, email grievance@starhealth.in or call 044-69006900. Submit a written request along with your policy document and KYC proofs. You can also visit any Star Health branch. The cancellation process and refund amount follow IRDAI’s standard terms and conditions.

    Can I cancel health insurance bought through PolicyBazaar or an agent?

    Yes. Even if you bought through a broker, the cancellation request must be submitted directly to the insurance company — not just the broker. Contact the insurer’s support department directly and submit a written request. For broker-assisted purchases, the cancellation process is the same as direct purchases.

    What documents do I need to cancel a health insurance policy?

    You need the official cancellation form (from the insurer), a written request stating the reason, an original or self-attested copy of the policy document, photo ID proof, and a cancelled cheque or bank details for the refund amount. Some insurers may also need your registered mobile number for OTP verification.

    Can the insurer refuse to cancel my health insurance policy?

    No. Under IRDAI regulations, an insurance company cannot refuse a cancellation request from a policyholder. They may try to retain you with better offers or ask for reasons — but the right to cancel your health insurance plan is absolute, subject to the terms and conditions of notice period and refund calculations.

    Is cancellation possible for health insurance in the free lock period online?

    Yes. For online health insurance plan purchases, cancellation during the free look period can also be done online — through the insurer’s portal, app, email, or WhatsApp chatbot. Submit all documents digitally, keep copies of all submissions, and request a digital acknowledgement. Conditions apply as per your specific policy.

    What’s the difference between the free look period and the grace period?

    The free look period is a window at the start of a new policy (30 days from receipt) during which you can cancel your health plan and get a refund. The grace period is at the end of the policy term (usually 30 days) — it’s additional time given to renew an expiring policy without losing coverage or waiting period benefits. The two serve opposite purposes.

    This article is for general information only. Policy terms, cancellation process rules, and refund amount calculations vary by insurer and plan. For personalised advice on cancelling or switching your health insurance plan, visit einsurefirst.com — your trusted insurance partner.

  • Does Car Insurance Cover Battery Replacement? The Honest Answer for Indian Car Owners

    Does Car Insurance Cover Battery Replacement? The Honest Answer for Indian Car Owners

    Written by the E-Insure First Content Team | Reviewed by Sunil Goyal, Director, E-Insure First | Last updated: June 2026

    Quick Answer:

    Car insurance typically does NOT cover the replacement of a car battery caused by normal wear and tear. Nevertheless, if the car battery is damaged by collision, fire, flood or theft, it is often covered by a comprehensive car insurance policy with covered loss. For electric vehicles, specialised battery protection add-ons are available — and highly recommended.

    So imagine this: Monday morning, you’re running late for work, you turn the key and… Nothing. Your car battery has decided to retire, on a Monday morning. Frustrating? Yes. Expensive? Well, that depends.

    For an Indian car owner, the immediate question that pops up in our heads is: ‘Can I claim my car insurance for this?’ And I get why. After all, before deciding whether a claim is worthwhile, it’s helpful to understand what NCB is in car insurance and how a claim can affect your future premium discounts.

    But does car insurance cover a battery replacement? Well, it depends. The answer depends entirely on why the battery failed and what type of insurance coverage you have.

    Let’s break it down in simple terms, covering everything from cars and EVs to smart additions that can bridge the gap:

    What Does Car Insurance Actually Cover?

    Before answering the battery question, it helps to understand the basics of how car insurance coverage works in India.

    Third-Party Insurance (mandatory by law) covers damage or injury you cause to other people or their property. It does absolutely nothing for your own car — including the car battery. 

    Comprehensive Insurance is where things get interesting. It covers your own vehicle against accidents, theft, fire, and natural disasters. But there’s a crucial catch: it covers losses from sudden, external events — not gradual deterioration.

    Own Damage (OD) Cover (standalone or bundled with comprehensive) covers your car’s physical damage from accidents and external perils — again, subject to exclusions.

    If you’re unsure about policy benefits beyond basic coverage, understanding what return to invoice in car insurance can help you choose stronger financial protection.

    When Does Car Insurance Cover Battery Replacement?

    Here’s the good news. There are real situations where insurance will cover your car battery replacement, and they’re more common than you might think:

    Accidental Damage

    If your car was in a collision and the impact physically damaged the car battery or the electrical system, your comprehensive insurance — or standalone own damage cover — can cover the cost of replacement. This is probably the most common scenario where insurance companies step in.

    Fire or Explosion

    Battery damage resulting from vehicle fire, short circuit or explosion will be covered under a comprehensive policy. The same would be applicable for both petrol/diesel cars and electric vehicles.

    Theft – Stolen or Damaged

    If the car as a whole is stolen, it would lead to payout of full IDV (Insured Declared Value) and would ultimately mean your loss, including the battery, is covered. Certain instances do occur when it is just the car battery which gets stolen (this occurs more in case of EVs or in cars that are installed with very high capacity batteries); in such cases the policy coverage will compensate battery replacement under the theft clause.

    Natural Disasters

    Flood, cyclone, earthquake, hailstone, etc are covered under a comprehensive car insurance. If there is a flood in the area and your car is immersed, leading to damage to the battery, it would be covered under the insurance policy.

    Vandalism

    If someone intentionally vandalises your car by smashing its windows, prying the bonnet open and causing damage to the car’s electrical system, battery damage incurred during the act will be covered under comprehensive car insurance.

    When Does Car Insurance NOT Cover Battery Replacement?

    This is where most people get surprised — and disappointed. The majority of battery replacement situations are NOT covered by car insurance.

    Scenario Covered?
    Accident Damage Yes
    Fire Yes
    Flood Yes
    Theft Yes
    Vandalism Yes
    Normal Wear & Tear No
    Battery Ageing No
    Manufacturing Defect No
    Poor Maintenance No
    Improper Charging No

    Normal Wear and Tear

    This is the big one. Due to normal wear and tear, car batteries naturally degrade over 3–5 years and eventually stop holding charge. This slow, natural decline is classified as routine maintenance by insurance companies — not a claimable event. It doesn’t matter if you have a basic third-party policy or the most comprehensive plan money can buy. Due to normal wear and tear, battery failure will not be covered.

    Think of it like your car tyres going bald — it happens gradually through use, not because of a sudden event. Standard car insurance policies in India generally do not cover the battery in these cases.

    Manufacturing Defects

    If your battery fails because of a factory defect, that’s a matter for your car manufacturer’s warranty — not your insurer.

    Improper Maintenance

    If you’ve run down your car – not checking fluid levels, ignoring warnings, or running your battery down on a regular basis – and it’s refused to start because of it, the responsibility is yours to bear.

    Mechanical or Electrical Breakdown

    A battery that simply fails over time due to age or repeated electrical faults is not a covered event. Unless the breakdown is directly linked to an accident or external peril, no car insurance claim will succeed.

    Consequential Damage

    This is a tricky one. Let’s say your car battery is damaged not directly by an accident, but as a downstream consequence — water getting into the system while driving through a puddle, for example. Standard comprehensive insurance typically excludes this as “consequential damage.” This is exactly why add-on covers exist.

    Car Battery Replacement Costs in India – What You’re Up Against

    Understanding the money at stake helps you decide whether add-on coverage is worth it.

    Petrol/Diesel Car Battery Replacement Costs (2026):

    Car Type 

    Battery Capacity 

    Approximate Cost 

    Hatchback (Swift, i10, Baleno) 

    35–45 Ah 

    ₹3,000 – ₹6,000 

    Sedan (City, Verna, Ciaz) 

    45–55 Ah 

    ₹5,500 – ₹8,500 

    Compact SUV (Creta, Seltos) 

    55–65 Ah 

    ₹9,500 – ₹13,000 

    Large SUV/MUV (Innova, XUV700) 

    65–75 Ah 

    ₹11,500 – ₹15,800 

    Luxury/Heavy Diesel (Fortuner) 

    85–100 Ah 

    ₹15,000 – ₹22,000 

    Electric Vehicle Battery Replacement Costs (2026):

    EV Model 

    Battery Size 

    Approximate Replacement Cost 

    Small EVs (Tata Tiago EV) 

    ~24 kWh 

    ₹1.5 – ₹2.5 lakh 

    Mid-size EVs (Nexon EV, MG ZS) 

    30–50 kWh 

    ₹3 – ₹4.5 lakh 

    Premium EVs (MG Comet, BYD) 

    50+ kWh 

    ₹5 lakh+ 

    For petrol and diesel cars, a battery dying is annoying but manageable — ₹5,000 to ₹15,000 is painful but survivable. For electric vehicles, the stakes are dramatically higher. A battery replacement on a mid-size EV could cost more than what many people paid for their first car.

    Electric Vehicles: Does EV Insurance Cover Battery Replacement?

    This deserves its own section because the rules are slightly different — and the financial risk is far greater.

    The short answer is: electric car insurance does not cover battery replacement in all scenarios.

    A standard car comprehensive insurance policy for an EV covers the battery in the same events as any other car — accidents, fire, theft, natural disasters, vandalism. But just like petrol cars, due to normal wear and tear and gradual battery degradation, no coverage applies.

    What makes EVs unique is the cost exposure. The EV battery pack accounts for 40–60% of the car’s total value. A minor underbody scrape or a stone hit to the battery casing can sometimes force a complete pack replacement — a potential claim of ₹7 lakh on a ₹15 lakh car.

    That’s why the insurance companies offering EV policies now have dedicated battery protection add-ons, and why every EV owner should seriously consider them.

    Key EV-Specific Scenarios That ARE Covered (with the right policy):

    • Accidental damage to the battery pack
    • Battery damage from flood/water ingress (with add-on)
    • Power surge or short circuit during charging (with Battery Protection add-on)
    • Fire or explosion involving the battery
    • Theft of the battery or the entire vehicle

    What Is NOT Covered Even for EVs:

    • Natural battery capacity degradation over years of use
    • Reduced driving range due to battery ageing
    • Software-related battery management issues
    • Damage from improper charging habits

    Add-Ons That Cover Your Car Battery

    The gap between what standard car insurance cover provides and what you actually need is bridged by add-ons. Here are the most important ones:

    Battery Protection Cover (EV-specific)

    The most direct answer to the EV battery question. This add-on covers battery replacement costs from:

    • Water ingress (driving through flooded roads)
    • Short circuits
    • Power surges during charging
    • External impact damage not clearly falling under accident cover

    This add-on is a must-have for any electric vehicle owner in India, especially given the ₹15,000–₹20,000 per kWh replacement cost for EV batteries.

    Consumables Cover (for petrol/diesel cars)

    A standard car’s comprehensive policy covers the big items but not smaller consumable parts. The Consumables Cover add-on covers the cost of:

    • Car battery replacement (in accident situations)
    • Engine oil and coolant
    • Lubricants, nuts, and bolts
    • Brake fluid

    Without this add-on, even if you have Zero Depreciation cover and your battery is damaged in an accident, the consumable cost may be deducted.

    Zero Depreciation Cover

    As your car ages, insurance companies apply a depreciation deduction on replaced parts when filing a claim. With Zero Depreciation cover, you get the full replacement value of parts — including the battery — without any depreciation cut. This is particularly valuable in the first 3–5 years of ownership.

    Return to Invoice (RTI)

    If your car is a total loss (heavily stolen or damaged beyond repair), RTI ensures you get the full invoice value — not the depreciated IDV. For electric vehicles where the battery makes up such a large portion of value, this cover is extremely relevant.

    Roadside Assistance Cover

    This won’t pay for a replacement battery, but it will get someone to your location to jump-start or tow you if a dead battery leaves you stranded. It’s an inexpensive add-on that saves real hassle.

    Should You File a Car Insurance Claim for Battery Replacement?

    Even when battery damage technically qualifies as a covered event, there are situations where filing a claim may not make financial sense. Before making a claim, learn how to check NCB in car insurance so you can calculate whether the claim is financially beneficial.

    Consider the trade-offs:

    • Petrol/diesel battery (5,000-15,000): With a deductible of 2,000-5,000 and your No-Claim Bonus being hit after settlement, you can end up paying even more out of pocket later in future premium increases. Best often paid from your own pocket.
    • EV battery (₹1.5 lakh+): Here, filing a claim almost always makes sense if the damage is a covered event. The financial exposure is too large to absorb without insurance companies involved.

    General rule: If the repair cost is less than 2–3× your deductible and you have an NCB of 25% or more, weigh the claim carefully. For large amounts — especially EV battery costs — always file if the situation is genuinely covered.

    How to File a Car Insurance Claim for Battery Damage

    Assuming your case fits the requirements, follow this step-by-step guide to file your claim without a hassle. Following the correct insurance claim process can help avoid delays and improve claim approval chances.

    Step 1 – Intimate Your Insurer: Call your insurer on their app/website or customer care line at the earliest after the damage has occurred. It is advisable not to delay it, since most policy documents clearly mention that you have to intimate your insurer within 24-48 hours after the occurrence.

    Step 2 – Gather evidence: Collect clear photos/videos of the damages, surroundings (in case of accident) and the car and keep them ready with you. In case of theft, file an FIR at the earliest.

    Step 3 – Get an Inspection Arranged: Your insurer will send a surveyor to inspect the damage. For EV batteries, insist on an authorised EV service centre — not a generic garage.

    Step 4 – Submit Documents

    • Claim form
    • Copy of your policy
    • RC (Registration Certificate)
    • Driving licence
    • FIR (for theft or third-party damage)
    • Repair estimate from authorised service centre

    Step 5 – Cashless or Reimbursement Settlement: If your insurer has a tie-up with the workshop, you may get a cashless settlement — the insurance companies pay the garage directly. Otherwise, pay and claim reimbursement with original bills.

    How to Make Your Car Battery Last Longer

    The best car insurance claim is the one you never have to make. Here are some practical tips to help your car battery last longer.

    • Don’t leave your car idle for long periods – A battery that doesn’t get charged through driving will drain and die faster.
    • Turn off electrical loads when the engine is off – AC, infotainment systems, and lights left on kill batteries faster.
    • Get the battery tested annually after the third year – Most service centres do it for free or a small fee.
    • Keep the terminals clean and corrosion-free – A thin layer of corrosion dramatically reduces performance.
    • Park in shade where possible, especially in Delhi summers – Extreme heat accelerates battery degradation.
    • For EVs: Avoid consistently charging to 100% or draining to 0%. Keeping charge between 20–80% preserves battery health significantly.

    Common Mistakes to Avoid

    Assuming all battery damage is covered – The most common mistake. Always check if the damage is from a covered event or due to normal wear and tear before investing hope in a claim.

    Not disclosing a modified battery – If you’ve upgraded your car battery to a higher-capacity aftermarket unit and haven’t informed your insurer, your claim may be rejected.

    Waiting too long to intimate the insurer – Delay in reporting is one of the top reasons car insurance claim rejections happen. Always call as soon as the damage occurs.

    Filing small claims unnecessarily – A ₹4,000 battery claim that erases your 25% NCB and pushes your premium up by ₹3,000 a year for 5 years is a net loss. Do the math.

    Skipping the Battery Protection add-on for your EV – The most expensive mistake an EV owner can make. A single flood event without this add-on could cost you lakhs.

    Using non-authorised service centres – For electric vehicles especially, some insurers will only cover losses if repairs are done at IRDAI-approved or manufacturer-authorised centres. Using a local garage can void the claim.

    Expert Tips from E-Insure First

    EV owners: treat battery protection as non-negotiable – The base comprehensive policy simply doesn’t fully cover battery replacement for consequential or non-accident scenarios. The add-on is low-cost relative to the risk.

    Buy Consumables Cover alongside Zero Depreciation – Zero Dep without Consumables Cover still leaves battery costs unprotected in many accident scenarios. Get both — they complement each other.

    Check your policy wording for “consequential damage” exclusions – This clause catches a lot of EV and standard car owners off guard. Know what’s excluded before you need to file a claim.

    Document your battery’s health regularly – In disputes with insurance companies, a battery health report from an authorised service centre can serve as evidence that the damage was sudden and external — not gradual wear.

    Compare policies on E-Insure First before renewal – Battery protection add-on availability and pricing vary significantly across insurance companies. Comparing before renewal can save you money and get you better coverage.

    Never skip the FIR for theft – If your car battery or entire vehicle is stolen or damaged by vandalism, an FIR is non-negotiable for the claim. No FIR = no claim, in most cases.

    Conclusion

    So, does car insurance cover battery replacement? The honest answer is: sometimes — and it really depends on why the battery failed.

    If your car battery was damaged in a road accident, destroyed by fire, washed out in a flood, or stolen or damaged through vandalism — and you have a comprehensive policy — insurance will cover the cost, often in full. But if your battery simply aged out due to normal wear and tear, no car insurance claim in the world will rescue you.

    For electric vehicles, the stakes are dramatically higher and the exclusions more impactful, which is why specialised add-ons like Battery Protection Cover are essential — not optional extras.

    The smartest move? Understand your policy before you need it, pick the right add-ons for your car type, and use a trusted platform like E-Insure First to compare plans that genuinely cover battery replacement under the scenarios that matter most to you.

    Comparing policies before renewal is important because factors that affect insurance premiums can significantly impact your coverage costs and benefits.

    Key Takeaways

    • Standard car insurance does NOT cover battery replacement due to normal wear and tear — this applies to both petrol/diesel and electric cars.
    • Battery replacement IS covered when damage results from covered events: accidents, fire, theft, floods, or vandalism under a comprehensive policy.
    • For electric vehicles, a Battery Protection add-on is essential — EV battery replacement can cost ₹1.5–4.5 lakh or more.
    • The Consumables Cover add-on makes battery replacement claimable even in accident scenarios for petrol/diesel cars.
    • Zero Depreciation + Consumables Cover is the best combination for full protection on standard car battery replacement (in accident situations).
    • Always intimate your insurer immediately when damage occurs — delay is a leading reason for car insurance claim rejection.
    • Small battery claims (petrol/diesel) may not be worth filing if they erase your No-Claim Bonus.
    • Use E-Insure First to compare policies and battery-specific add-ons before your next renewal.

    Frequently Asked Questions (FAQs)

    Does car insurance cover battery replacement in India?

    Standard car insurance does not cover battery replacement caused by normal wear and tear or age-related failure. However, if the car battery is damaged due to covered events — such as an accident, fire, flood, or theft — a comprehensive policy can cover the cost of replacement, subject to policy terms and deductibles.

    Does comprehensive car insurance cover a dead battery?

    If the battery died naturally due to age or usage, no — comprehensive insurance will not cover it. But if the battery was damaged in a road accident, burned in a fire, submerged in a flood, or stolen or damaged by vandalism, insurance will cover the cost under the own damage or comprehensive component of your policy.

    Does car insurance cover battery replacement for electric vehicles?

    A standard comprehensive electric vehicle insurance covers EV battery damage from accidents, fire, theft, and natural disasters. However, consequential damage (like water ingress while driving through a puddle) and degradation due to normal wear and tear are excluded. A Battery Protection add-on is strongly recommended for all electric vehicle owners in India.

    What add-on should I buy to cover car battery replacement?

    For standard car (petrol/diesel) owners: buy a Consumables Cover add-on alongside Zero Depreciation. For electric vehicles: buy a Battery Protection Cover add-on. Both help cover losses related to battery damage that standard policies exclude.

    Can I file a car insurance claim for battery replacement after a flood?

    Yes. Flood damage is a covered event under comprehensive car insurance. If your car battery was destroyed because of a flood or other natural disaster, you can file a car insurance claim for battery replacement, subject to your policy terms and the deductible amount.

    How much does car battery replacement cost in India in 2026?

    For petrol/diesel cars, battery replacement typically costs ₹3,000–₹22,000 depending on the vehicle type — hatchbacks on the lower end, large SUVs and diesel cars at the higher end. For electric vehicles, costs range from ₹1.5 lakh to ₹4.5 lakh or more, depending on the battery capacity and model.

    Does zero depreciation cover car battery replacement?

    Zero Depreciation reduces or eliminates depreciation cuts on replaced parts. However, for it to cover battery replacement, you typically also need a Consumables Cover add-on. Without Consumables Cover, even a Zero Dep policy may not fully reimburse the battery cost after an accident.

    Will my no-claim bonus be affected if I file a battery replacement claim?

    Yes. Any car insurance claim — including one for battery damage — resets or reduces your No-Claim Bonus (NCB). For smaller battery costs (petrol/diesel cars at ₹5,000–₹10,000), it may not be financially wise to file a claim if you have a significant NCB. Calculate the trade-off before filing a claim.

    Is a stolen car battery covered under car insurance?

    If your entire car is stolen or damaged, yes — comprehensive insurance compensates the full IDV, which includes the battery. If only the battery was stolen separately, coverage depends on your specific policy wording. Most comprehensive plans cover external theft as a covered event, but always check your policy or consult E-Insure First.

    What is not covered in car insurance for battery damage?

    Car insurance will not cover battery replacement in these cases: gradual battery ageing due to normal wear and tear, manufacturing defects (covered under manufacturer warranty), improper charging habits, software or battery management system failures, and consequential damage unless a specific Battery Protection add-on is purchased.

    Does third-party insurance cover battery replacement?

    No. Third-party insurance only covers damages caused to other people, vehicles, or property and does not cover your own vehicle’s battery.

    How long does a car battery typically last in India?

    Most petrol and diesel car batteries last between 3 and 5 years, depending on driving habits, weather conditions, and maintenance.

  • How to Check Heritage TPA Claim Status Online in 2026

    How to Check Heritage TPA Claim Status Online in 2026

    Written by the E-Insure First Content Team | Reviewed by Sunil Goyal, Director, E-Insure First | Last updated: June 2026

    Quick Answer: To check your Heritage TPA claim status, visit portal.heritagehealthtpa.com/auth/searchclaimstatus → select your insurance company → enter your policy number, card number, policy year, and employee ID → click Submit. Your Heritage Health TPA claim status will be displayed instantly.

    It is always stressful to wait for an update on a health insurance claim, particularly after being discharged from the hospital. If you’re trying to check your Heritage Health TPA claim status, the process takes only a few minutes and can be completed entirely online.

    From cashless claim approval to reimbursement, you would want to keep a finger on your claim status to stay updated or to send any further documents if needed.

    This guide tells you all in simple language with easy step-by-step instructions. If you’re unfamiliar with how TPAs work in health insurance, you may also want to understand what a TPA in insurance is before tracking your claim.

    What is Heritage Health TPA?

    Heritage Health Insurance TPA Pvt. Ltd. Is a Third Party Administrator (TPA) by IRDAI-approved which administers health insurance claims on behalf of a few major insurance companies in India. In most cases, you don’t need to follow up directly with the insurer because Heritage manages the claim process on its behalf. Instead, all your claims are administered by Heritage Health TPA, which takes care of verification, authorization and settlement.

    Heritage Health TPA services a large number of group health insurance policyholders across India — including bank staff covered under IBA policies, LIC employees, and corporate employees. If your health card shows the Heritage Health TPA logo, they are your claims manager.

    Heritage Health TPA Pvt. Ltd. Key Details:

    Detail  Information 
    Full Name  Heritage Health Insurance TPA Pvt. Ltd. 
    IRDAI Approved  Yes 
    Headquarters  Kolkata, West Bengal 
    Customer Care  1800 102 4547 (Toll-Free) 
    Email  heritage_health@bajoria.in 
    Claim Status Portal  portal.heritagehealthtpa.com 
    Services  Cashless claims, reimbursement, e-cards, hospital network 

    How to Check Heritage TPA Claim Status Online

    The Heritage Health TPA claim status can be checked using the following process:

    Step 1: Visit the official portal: 👉 portal.heritagehealthtpa.com/auth/searchclaimstatus

    Step 2: Choose your insurance company from the drop-down box

    Step 3: Enter the following details:

    • Policy Number
    • Card Number (from your Heritage Health TPA card)
    • Policy Year
    • Employee ID

    Step 4: Click Submit. Your Heritage Health TPA claim status will be displayed on screen

    Step 5: You may also receive claim updates through SMS or email on your registered contact details.

    Before checking your claim status, keep the following details ready: Health card, Policy wordings & your claim reference number (CCN) appearing in any of the letters or emails you would have received from Heritage.

    Heritage TPA Claim Status – What the Status Means

    Once you submit your details, the portal shows your real-time Heritage Health TPA claim status. Here’s what each status typically means:

    Status Shown  What It Means 
    Pending  Claim received, documents under review 
    Under Review  TPA is verifying policy and treatment details 
    Query Raised  Additional documents or information required from you 
    Approved  Claim sanctioned — amount confirmed 
    Paid  Amount transferred or settled with hospital 
    Rejected  Claim not approved — reason will be specified 

    If your status shows “Query Raised”, act quickly. Heritage will send a letter or email listing exactly what they need. Responding within 15 days is critical; delayed responses can result in the claim not being processed further.

    Check Heritage TPA Claim Status on the Mobile App

    Heritage Health Insurance TPA has a mobile app available for both Android and iOS. Through the app, you can:

    • View your Heritage Health TPA claim status
    • Download your e-card
    • Find network hospitals in your city
    • Register a grievance
    • Submit intimation for a new claim

    The Android version is updated frequently. Some iOS users have reported missing certain claim status features; if that happens, checking on the portal directly works better.

    App Name: Heritage Health Insurance Available on: Google Play Store and Apple App Store

    Heritage TPA Claims Process – Cashless vs Reimbursement

    Understanding the claims process helps you track the right type of claim.

    Cashless Claim

    A cashless claim means the hospital settles directly with Heritage Health TPA; you don’t pay out of pocket for covered expenses.

    • Must be treated at a Heritage Health TPA network hospital
    • Inform Heritage at least 24 hours before planned admission (4 hours for emergencies)
    • Present your health card at the hospital insurance desk
    • Hospital sends pre-authorisation request to Heritage. If you’re not sure how the approval process works, read our guide on the health insurance claim process.
    • Heritage approves and settles directly with the hospital

    Reimbursement Claim

    If you were treated at a non-network hospital or paid upfront, you claim reimbursement after discharge.

    • Collect all original bills, discharge summary, and reports
    • Submit documents to Heritage Health TPA within 30 days of discharge
    • Track your Heritage Health insurance TPA claim status on the portal
    • Approved amount is transferred to your bank account via NEFT

    Heritage Health TPA Network Hospitals

    One of the most important things to check before admission is whether your hospital is part of the Heritage Health TPA hospital list (network hospitals). Cashless treatment is only available at empanelled hospitals. You may also find it useful to see how network hospital lists work using the Care Health Insurance hospital list example.

    The Heritage Health TPA hospital list with network hospitals can be accessed on the official portal under the network hospitals section.

    How to find Heritage network hospitals:

    1. Visit portal.heritagehealthtpa.com
    2. Click on “Network Hospitals” or “Hospital Search”
    3. Enter your city and PIN code
    4. Get the list of empanelled hospitals near you

    Always confirm with the hospital directly that they currently accept cashless claims under Heritage before admission — hospital empanelment can change.

    Heritage Health TPA Claim Status for Bank Staff and LIC Employees

    Heritage Health TPA is widely used for group health insurance policies covering:

    • Bank staff under IBA (Indian Banks’ Association) medical schemes
    • LIC employees and their families
    • Corporate employees of various organisations

    If you are checking Heritage Health TPA claim status for bank staff or Heritage Health TPA IBA claim status, the same portal and steps apply — but your Employee ID should be your bank employee number, and you should select your respective bank or PSU as the insurance company from the drop-down.

    For Heritage Health TPA LIC staff claim status, select LIC as your insurance company during the portal search.

    Heritage Health TPA Customer Care

    If the portal doesn’t give you a clear answer, or your claim has been stuck for more than a week, reach out directly:

    Contact Method  Details 
    Toll-Free Helpline  1800 102 4547 
    Email (General)  heritage_health@bajoria.in 
    Mumbai Office Email  heritagemumtpa@bajoria.in 
    Mumbai Office Phone  (022) 6906 2500 / 2823 2503 
    Portal Login  portal.heritagehealthtpa.com 

    Please have your Claim Reference Number (CCN), policy number and date of treatment handy when you telephone or e-mail us. The CCN number is prefixed by HH followed by 9 digits, for example, HH871748610.

    Is Your Health Insurance Working as Hard as It Should?

    It shouldn’t be that difficult dealing with claim portals & TPAs. Is your current group health insurance plan/individual policy just not working out? Slow claim support, narrow networks, limited hospitals, poor support – maybe it is time to look for a better health plan.

    Compare health insurance plans with better claims support, higher CSR and wider hospital networks. Before choosing a policy, review these benefits of health insurance in India.

    Explore Plans on E-Insure First Free. No spam. IRDAI-regulated. Instant quotes from 30+ top insurers.

    Conclusion

    Checking your Heritage Health TPA claim status online is simple and usually takes only a few minutes. Whether you’ve submitted a cashless or reimbursement claim, tracking the status regularly helps you avoid delays and respond quickly if additional documents are requested. Keep your policy number, health card details, and claim reference number handy for a smoother experience.

    Frequently Asked Questions

    How do I check my Heritage TPA claim status?

    Visit portal.heritagehealthtpa.com/auth/searchclaimstatus, select your insurance company, and enter your policy number, card number, policy year, and employee ID. Your Heritage TPA claim status will be displayed immediately.

    What is Heritage Health Insurance TPA?

    Heritage Health Insurance TPA Pvt. Ltd. is an IRDAI-approved Third Party Administrator. If you want to compare it with other TPAs operating in India, you can also read about Good Health Insurance TPA Limited.

    How long does Heritage TPA take to settle a claim?

    Cashless claims are typically pre-authorised within 2–4 hours of request. Reimbursement claims are generally settled within 15–30 working days of receiving complete documentation. If your Heritage Health TPA claim status shows “Query Raised,” respond within 15 days to avoid delays.

    What if my Heritage TPA claim is rejected?

    If your Heritage Health insurance TPA claim status shows “Rejected,” you will receive a rejection reason. You have the right to escalate to your insurance company’s grievance cell or approach IRDAI’s Bima Bharosa portal if you believe the rejection is incorrect.

    Can I check Heritage TPA claim status on a mobile app?

    Yes. The Heritage Health Insurance app is available on Android and iOS. You can check Heritage Health TPA online claim status, download your e-card, and find network hospitals from the app.

    What documents do I need to check Heritage TPA claim status?

    You need your policy number, health card number, policy year, and employee ID. For reimbursement tracking, your Claim Reference Number (CCN) from your intimation letter is also useful.

    Why is my Heritage claim showing “Under Review” for several days?

    Claims can remain under review while the TPA verifies treatment details, hospital records, or policy coverage. If the status does not change for an extended period, contact customer support.

    What should I do if Heritage asks for additional documents?

    Submit the requested documents as soon as possible. Delays in responding may extend claim processing times.

    Can I track both cashless and reimbursement claims online?

    Yes. The Heritage claim status portal allows policyholders to track both cashless and reimbursement claims using their policy and card details.

  • FHPL Login: How to Access eCard, Claim Status, Hospital & Sparrow Portal (2026)

    FHPL Login: How to Access eCard, Claim Status, Hospital & Sparrow Portal (2026)

    Written by the E-Insure First Content Team | Reviewed by Sunil Goyal, Director, E-Insure First | Last updated: June 2026

    Quick Answer – FHPL Login

    To log in to FHPL, visit www.fhpl.net, click the Login dropdown at the top-right, select your user type (Employee / Hospital / Corporate / Agent), enter your credentials, and click Login.

    For the FHPL eCard login, go directly to www.fhpl.net/fhpllogins/ecard/login.aspx?type=ecard. Hospitals use the FHPL pre-auth login at epreauth.fhpl.net. Alternatively, download the FHPL Sparrow app on Android or iOS for on-the-go access.

    What is FHPL? (Family Health Plan Insurance TPA Limited)

    Before we get into the login steps, let’s quickly understand what you’re actually logging into, because “FHPL” means different things to different people who land on that login page. It helps to understand what FHPL is and how it supports health insurance policyholders, hospitals, and employers.

    FHPL stands for Family Health Plan Insurance TPA Limited. It was incorporated in 1995 and became one of India’s first IRDAI-licensed Third Party Administrators (TPAs) in 2002. Think of a TPA as the middleman between your insurance company and the hospital; they handle claims, pre-authorisations, and cashless hospitalisations. If you’re unfamiliar with the role of TPAs, understanding what TPA in insurance is can make the FHPL login process easier to follow.

    Here’s what makes Family Health Plan Insurance TPA Limited stand out in India’s TPA landscape:

    • Presence across 25+ states and 55+ service locations in India
    • Access to 7,000+ network hospitals nationwide. Similar healthcare networks are also used by insurers that maintain extensive Care Health Insurance hospital lists across India.
    • Serves individual policyholders, corporate employees, and government health scheme beneficiaries
    • Among the early Indian TPAs to introduce mobile access through FHPL Sparrow
    • Certified under ISO quality and information security standards.

    So whether you’re a corporate employee accessing your health eCard, a hospital sending a pre-authorisation request, or an HR manager managing group policy benefits – FHPL has a dedicated login portal for you.

    All FHPL Login Types – At a Glance

    The FHPL portal at www.fhpl.net has multiple login types depending on who you are. Here’s a quick map before we go into each one in detail:

    Login Type Purpose Access Method
    Employee Login eCard & benefits FHPL eCard Portal
    Hospital Login Claims & approvals Hospital Dashboard
    Corporate Login Employee policy management Corporate Portal
    Agent Login Client servicing Agent Portal
    Pre-Auth Login Cashless approval requests ePreAuth
    Sparrow App Mobile access Android & iOS

    Employee / eCard Login

    For corporate employees to access health eCard, policy, and benefits
    www.fhpl.net/fhpllogins/ecard/login.aspx?type=ecard

    Hospital Provider Login

    For network hospitals to raise and track cashless claims
    www.fhpl.net → Login → Hospital/Provider

    Corporate Login

    For HR teams managing employee health insurance policies
    www.fhpl.net → Login → Corporate

    Agent Login

    For insurance agents to manage client policies and claims
    www.fhpl.net → Login → Agent

    Pre-Auth Login (Hospitals)

    Dedicated portal for hospitals to submit pre-authorisation requests online
    epreauth.fhpl.net

    FHPL Sparrow App

    Mobile app login for employees – eCard, claims, hospitals, all in one

    Android: Play Store | iOS: App Store

    FHPL Employee Login (www.fhpl.net Login / eCard Login)

    This is the most searched FHPL login type. If you’re a corporate employee whose company uses FHPL as their health insurance TPA, this is how you access your digital health eCard, policy details, and benefit information.

    Step-by-Step: FHPL Employee eCard Login

    1. Go to the FHPL eCard login page

    Open your browser and go to: www.fhpl.net/fhpllogins/ecard/login.aspx?type=ecard — or visit www.fhpl.net and click Login → Employee/eCard.

    2. Enter your Corporate ID

    Your Corporate ID is a unique identifier assigned to your employer by FHPL. Your HR team should have shared this during onboarding.

    3. Enter your Employee ID / Username and Password

    These credentials are shared by FHPL during your policy enrollment. If you’ve never logged in before, check with your HR team for first-time credentials.

    4. Click Login / Submit

    Once logged in, you can view your health eCard, download it, check your sum insured, view network hospitals, and check dependent details.

    Can’t find your credentials? Your Corporate ID, username, and password are shared by FHPL at the time of policy enrollment — typically through your HR department. If you’ve never received them, email info@fhpl.net or call the FHPL helpline: 1800-425-033 (toll-free).

    FHPL Hospital Provider Login

    If you’re a hospital administrator or TPA desk executive, the FHPL hospital login or FHPL provider login gives you access to manage cashless claims, pre-authorisation statuses, and patient admission data.

    Step-by-Step: FHPL Hospital Login

    1. Visit the main FHPL portal

    Go to www.fhpl.net and click the Login button on the top navigation bar.

    2. Select “Hospital / Provider” from the dropdown

    The login dropdown shows multiple user categories. Select Hospital or Provider to access the hospital-specific login screen.

    3. Enter your Hospital Provider ID and Password

    Use the credentials issued to your hospital by FHPL when your hospital was empanelled into the FHPL network hospital list.

    4. Access the hospital dashboard

    From here, you can view patient claim details, check pre-authorisation status, and raise cashless requests for admitted patients.

    For Pre-Authorisation requests specifically: Hospitals should use the dedicated FHPL Pre-Auth login at epreauth.fhpl.net – a separate portal that allows online submission of cashless pre-auth requests without email or fax, with faster TATs.

    FHPL Corporate Login

    HR managers and corporate admins use the FHPL corporate login to manage employee group health insurance policies – adding/removing employees, viewing policy documents, and generating reports.

    1. Visit www.fhpl.net

    Open the FHPL portal and click the Login dropdown in the top-right corner.

    2. Select “Corporate” login type

    Choose the Corporate option from the dropdown menu to proceed to the corporate-specific login screen.

    3. Enter Corporate Login ID and Password

    Your FHPL corporate login ID and password are assigned by FHPL at the time of policy inception. Contact your FHPL relationship manager if you need assistance.

    4. Manage your employee health data

    Access endorsements, employee rosters, claim MIS reports, and communicate policy updates to your FHPL account manager from the corporate dashboard.

    FHPL Pre-Auth Login (ePreauth Portal)

    The FHPL preauth login, also known as the FHPL e-preauth login, is exclusively for hospitals to send cashless pre-authorisation requests digitally. This replaced the older fax-and-email system with a real-time web-based application that gives hospitals faster approvals.

    • URL: epreauth.fhpl.net
    • Who uses it: Hospital TPA desks and admission teams
    • What you can do: Submit new pre-auth requests, check approval status, upload supporting documents, and get real-time approvals from FHPL medical teams
    • Benefit: Faster TATs than email/fax; requests go directly into FHPL’s processing queue

    Note for patients: The FHPL epre-auth portal is only for hospitals, not for individual patients. If you want to initiate cashless hospitalisation as a patient, contact the hospital’s TPA desk – they will submit the pre-auth request on your behalf. Cashless hospitalisation approvals are regulated under health insurance guidelines issued by IRDAI.

    FHPL Sparrow Login – The Smarter Way to Access FHPL

    Many users are unaware that FHPL also offers a dedicated mobile app for managing health insurance services. You don’t have to go through the www fhpl net login page every single time. The FHPL Sparrow app, officially called FHPL Mobile Sparrow, gives you everything the web portal offers, from your smartphone, 24×7.

    FHPL was among the first TPAs in India to introduce a mobile application for policyholders, way back in FY 2013–14. The Sparrow app has since grown into a comprehensive health management tool. Here’s what it does:

    • Digital Health eCard – always on your phone
    • Find FHPL Network Hospitals near you
    • Real-time Claim Status tracking
    • Initiate Cashless Hospitalisation
    • Book Home Healthcare Services
    • Doctor Appointment Booking
    • Submit & Track Claim Forms
    • WhatsApp Bot for instant support

    How to Log in to FHPL Sparrow

    1. Download the FHPL Sparrow app

    Available on Google Play Store (search “Fhpl Sparrow”) and Apple App Store
    (search “FHPL Sparrow”). The app is free to download.

    2. Open the app and tap Login

    On the home screen, tap the login button. You’ll see options for OTP-based login or credential-based login.

    3. Enter your registered mobile number or Employee ID

    The app supports OTP-based login for ease; enter your registered mobile number and verify with the OTP sent to your phone. Alternatively, use your employee credentials.

    4. Access your health dashboard

    Once logged in via FHPL Sparrow login. Your eCard, claim history, hospital list, and wellness features are all right there.

    FHPL WhatsApp Support: Don’t want to open the app? Send a “Hi” to 9154039276 on WhatsApp for instant claim status, eCard access, and support – FHPL’s chatbot works 24×7.

    How to Check FHPL Claim Status

    One of the most common reasons people visit the FHPL login page is to check their claim status. Understanding the overall insurance claim process can also help policyholders know what to expect during claim approval.

    Here are all three ways to do it:

    Method 1: FHPL Website Claim Tracker

    1. Go to the claim tracking page

    Visit www.fhpl.net/#/claim_tracking

    2. Select your insurance company

    Choose from the dropdown: HDFC ERGO, Star Health, New India, etc.

    3. Enter Claim Number / UHID and Date of Hospitalisation

    Fill in the details and click Submit to view real-time status.

    Method 2: FHPL Sparrow App

    Log in to the FHPL Sparrow app → tap “Claim Status” from the home screen → your active and past claims will be displayed with current status updates.

    Method 3: WhatsApp Chatbot

    Send “Hi” to 9154039276 on WhatsApp and type your claim number. The FHPL chatbot responds instantly with the latest status – no login required.

    Policyholders can also review insurance grievance and claim-related guidance available through the Insurance Ombudsman framework.

    CTA: Need health insurance beyond your corporate policy? Compare Plans on eInsureFirst →

    Forgot Password / FHPL Login Issues

    Locked out? Can’t remember your credentials? Here’s what to do:

    • Forgot Password: On the FHPL login page, click “Forgot Password” and follow the prompts using your registered email or mobile number.
    • First-time login / no credentials: Contact your HR team or FHPL helpline. Your Corporate ID and enrollment credentials are issued by FHPL and relayed through your employer.
    • FHPL Customer Care Number: 1800-425-033 (toll-free, available during business hours)
    • Email: info@fhpl.net
    • For HDFC Bank employees: Use your specific FHPL HDFC Bank employee login credentials issued by HDFC’s HR team – these are separate from regular FHPL employee accounts.
    • For SBI Retired Employees: The SBI retired employee FHPL login uses credentials shared through SBI’s HR/pension department. Contact your SBI branch for enrollment assistance.

    Is your company’s group cover enough? Understanding the benefits of health insurance in India can help you decide whether additional personal coverage is necessary. Explore personal health insurance to fill the gaps.

    Get a Free Quote →

    Conclusion

    FHPL offers multiple login options for employees, hospitals, corporate administrators, and insurance agents. Whether you need to access your health eCard, check a claim status, submit a pre-authorisation request, or manage employee benefits, the correct portal depends on your user type. For the best experience, consider using the FHPL Sparrow app, which provides quick access to most services from your smartphone.

    Frequently Asked Questions (FAQs)

    I forgot my FHPL login credentials. What should I do?

    Use the “Forgot Password” option on the login page or contact your HR team if your account was created through an employer-sponsored health plan.

    Can I access my FHPL eCard on my phone?

    Yes. The FHPL Sparrow app allows users to view and download their digital health eCard directly from their smartphone.

    Who should use the FHPL pre-authorisation portal?

    The ePreAuth portal is designed for hospitals and TPA desks that need to submit cashless hospitalisation requests on behalf of patients.

    Why can’t I log in to my FHPL account?

    Login issues are often caused by incorrect credentials, inactive accounts, browser-related problems, or missing enrollment details from your employer.

    How do I check FHPL claim status without login?

    You can check FHPL claim status without logging in by visiting www.fhpl.net/#/claim_tracking and entering your claim number and date of hospitalisation. Alternatively, send “Hi” to 9154039276 on WhatsApp for instant updates via FHPL’s chatbot.

    What is the FHPL customer care number?

    The FHPL customer care number is 1800-425-033 (toll-free). You can also email info@fhpl.net or use the WhatsApp chatbot on 9154039276 for 24×7 support.

    I’m an HDFC Bank employee – how do I do FHPL HDFC login?

    HDFC Bank employees use the standard FHPL employee login at www.fhpl.net. Your specific Corporate ID and credentials are issued by HDFC’s HR department in coordination with FHPL. Contact your HR team if you haven’t received your login details.

    Group Covers Good – But Is It Enough?

    Your employer’s group health insurance via FHPL covers you at work. But it ends the day you leave. A personal health insurance plan ensures you’re covered for life, on your terms.

    Compare Health Plans Talk to an Expert

    Before purchasing additional coverage, it’s worth reviewing the top health insurance companies in India to compare benefits, network hospitals, and claim support.

    Disclaimer: Login URLs and portal features are based on publicly available information from FHPL’s official website and app listings as of June 2026. For the most current access details, always refer to www.fhpl.net or contact FHPL customer care directly. E-Insure First is not affiliated with Family Health Plan Insurance TPA Limited.